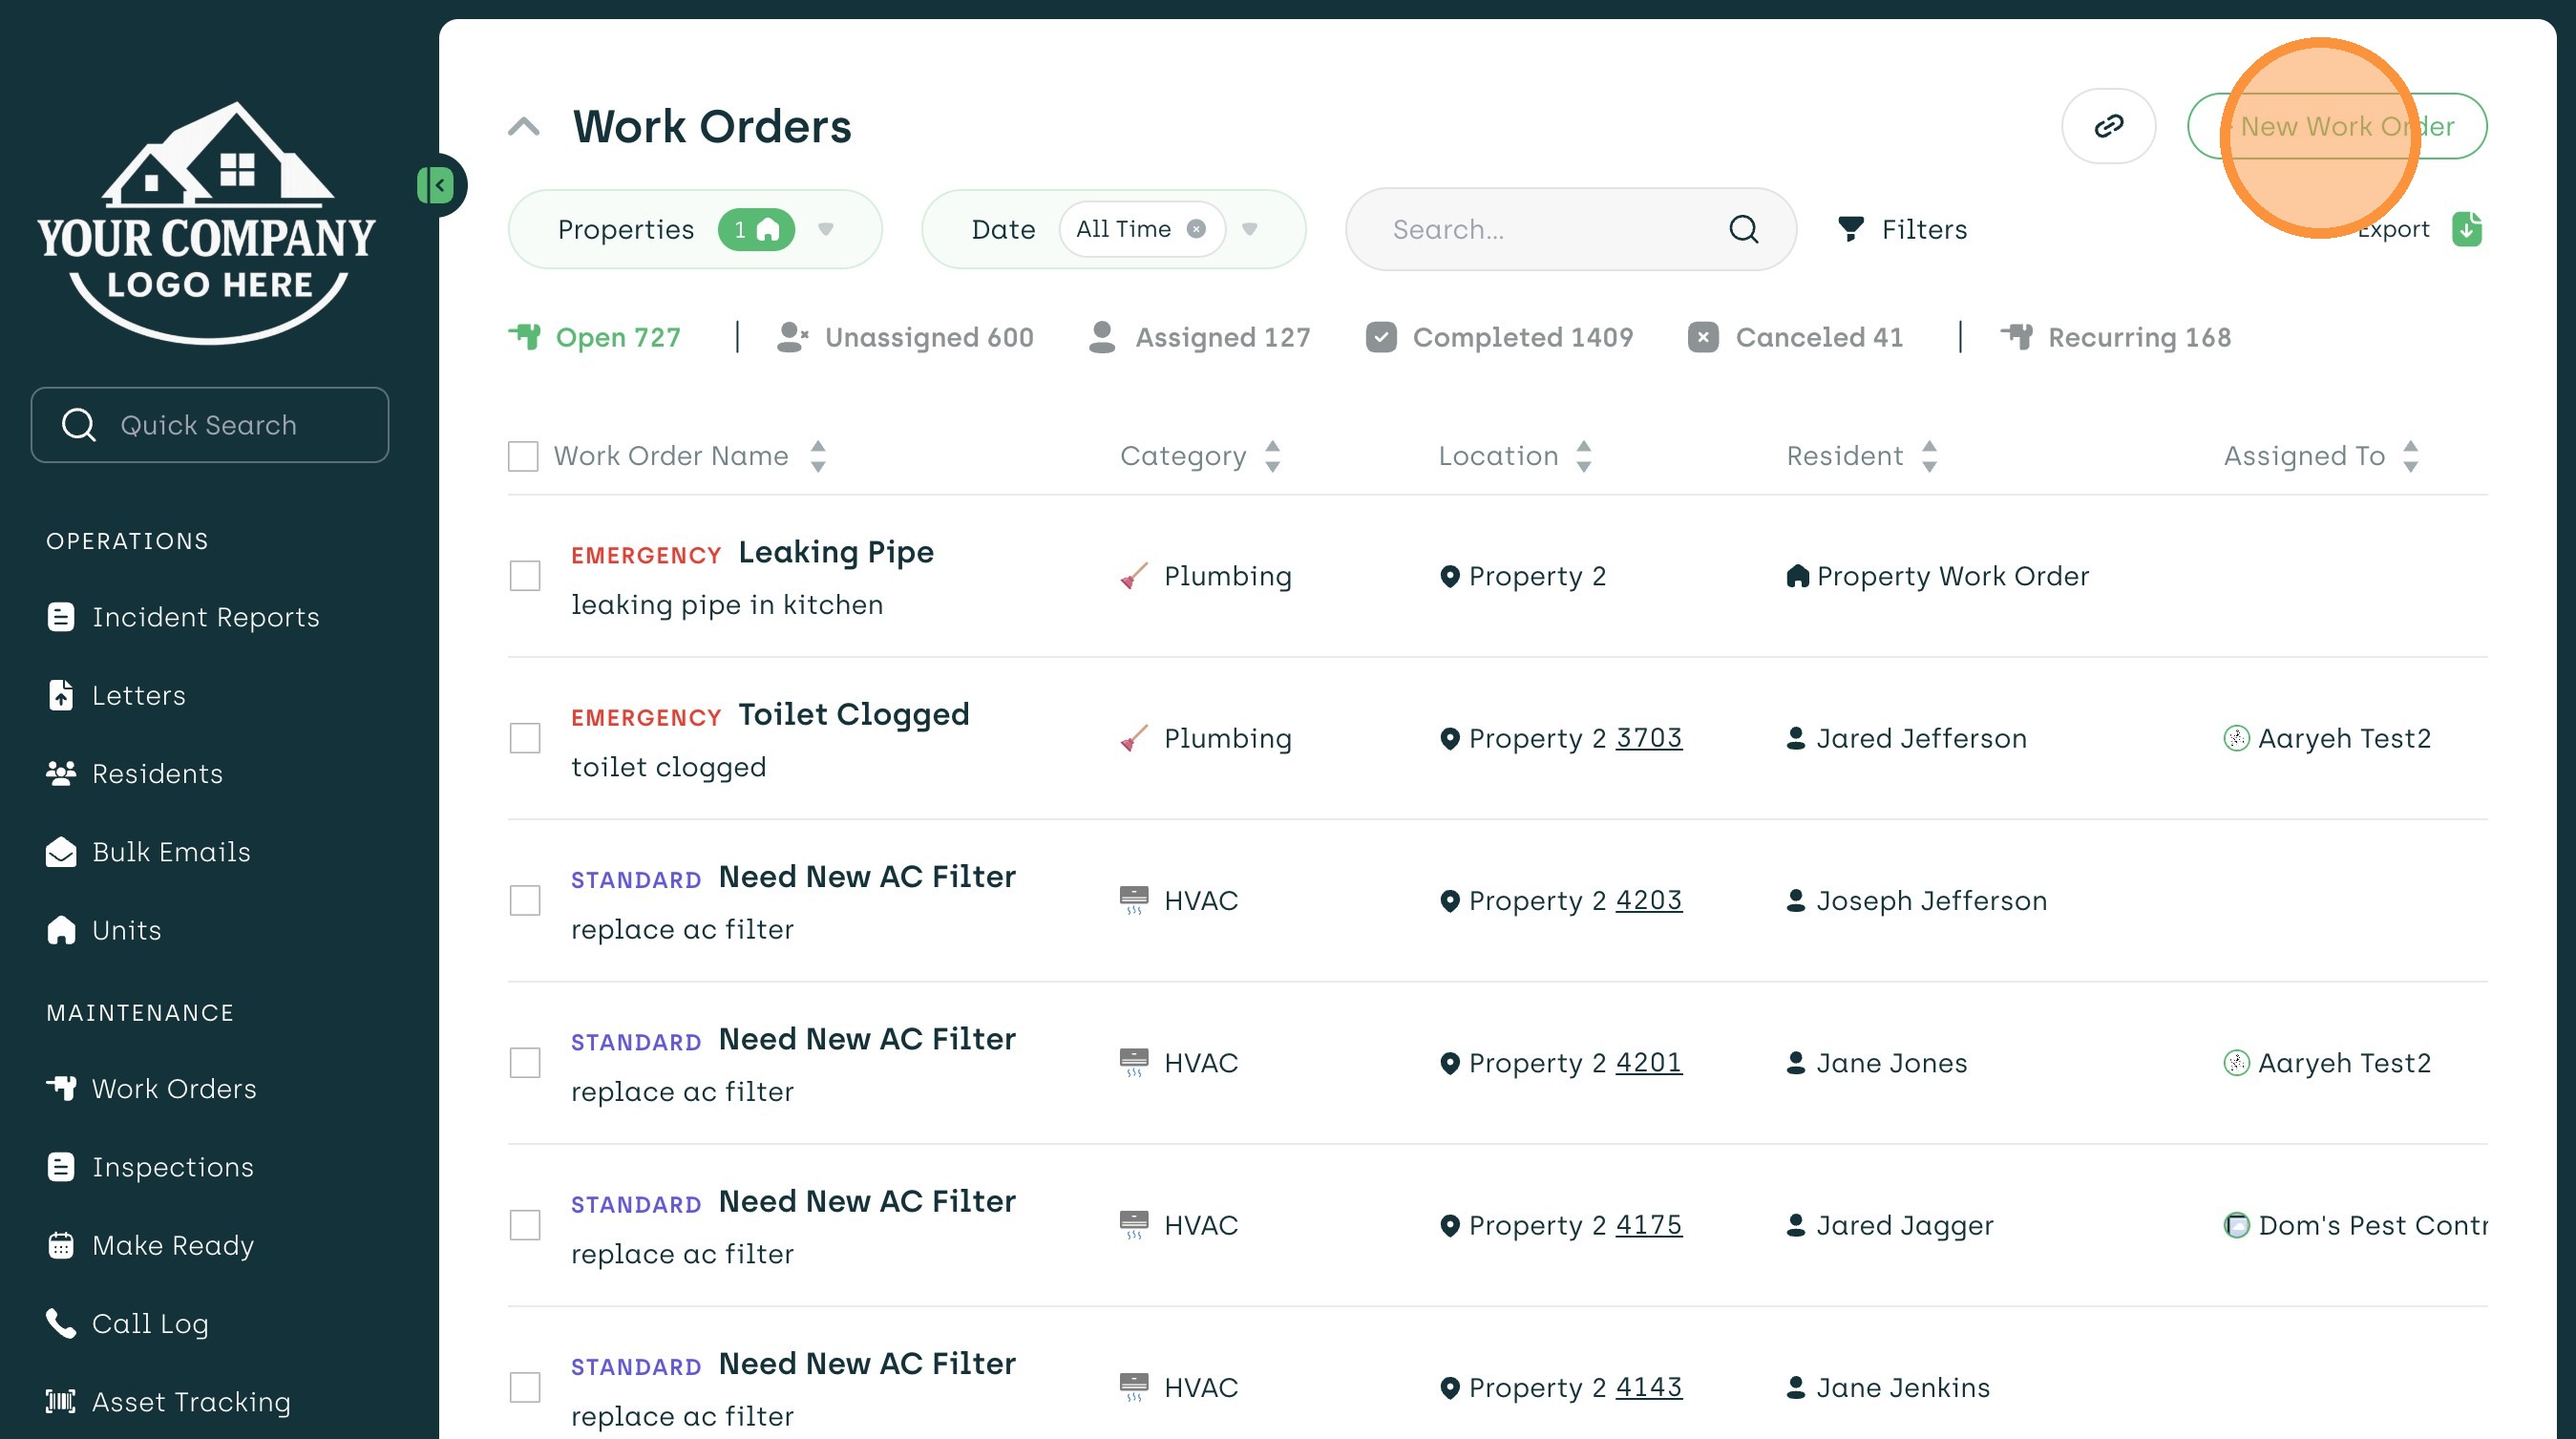
1. Navigate to the Admin Portal and click on the "Work Order" tab in the left-hand menu.
2. Click "+ New Work Order" on the top right corner of the page.
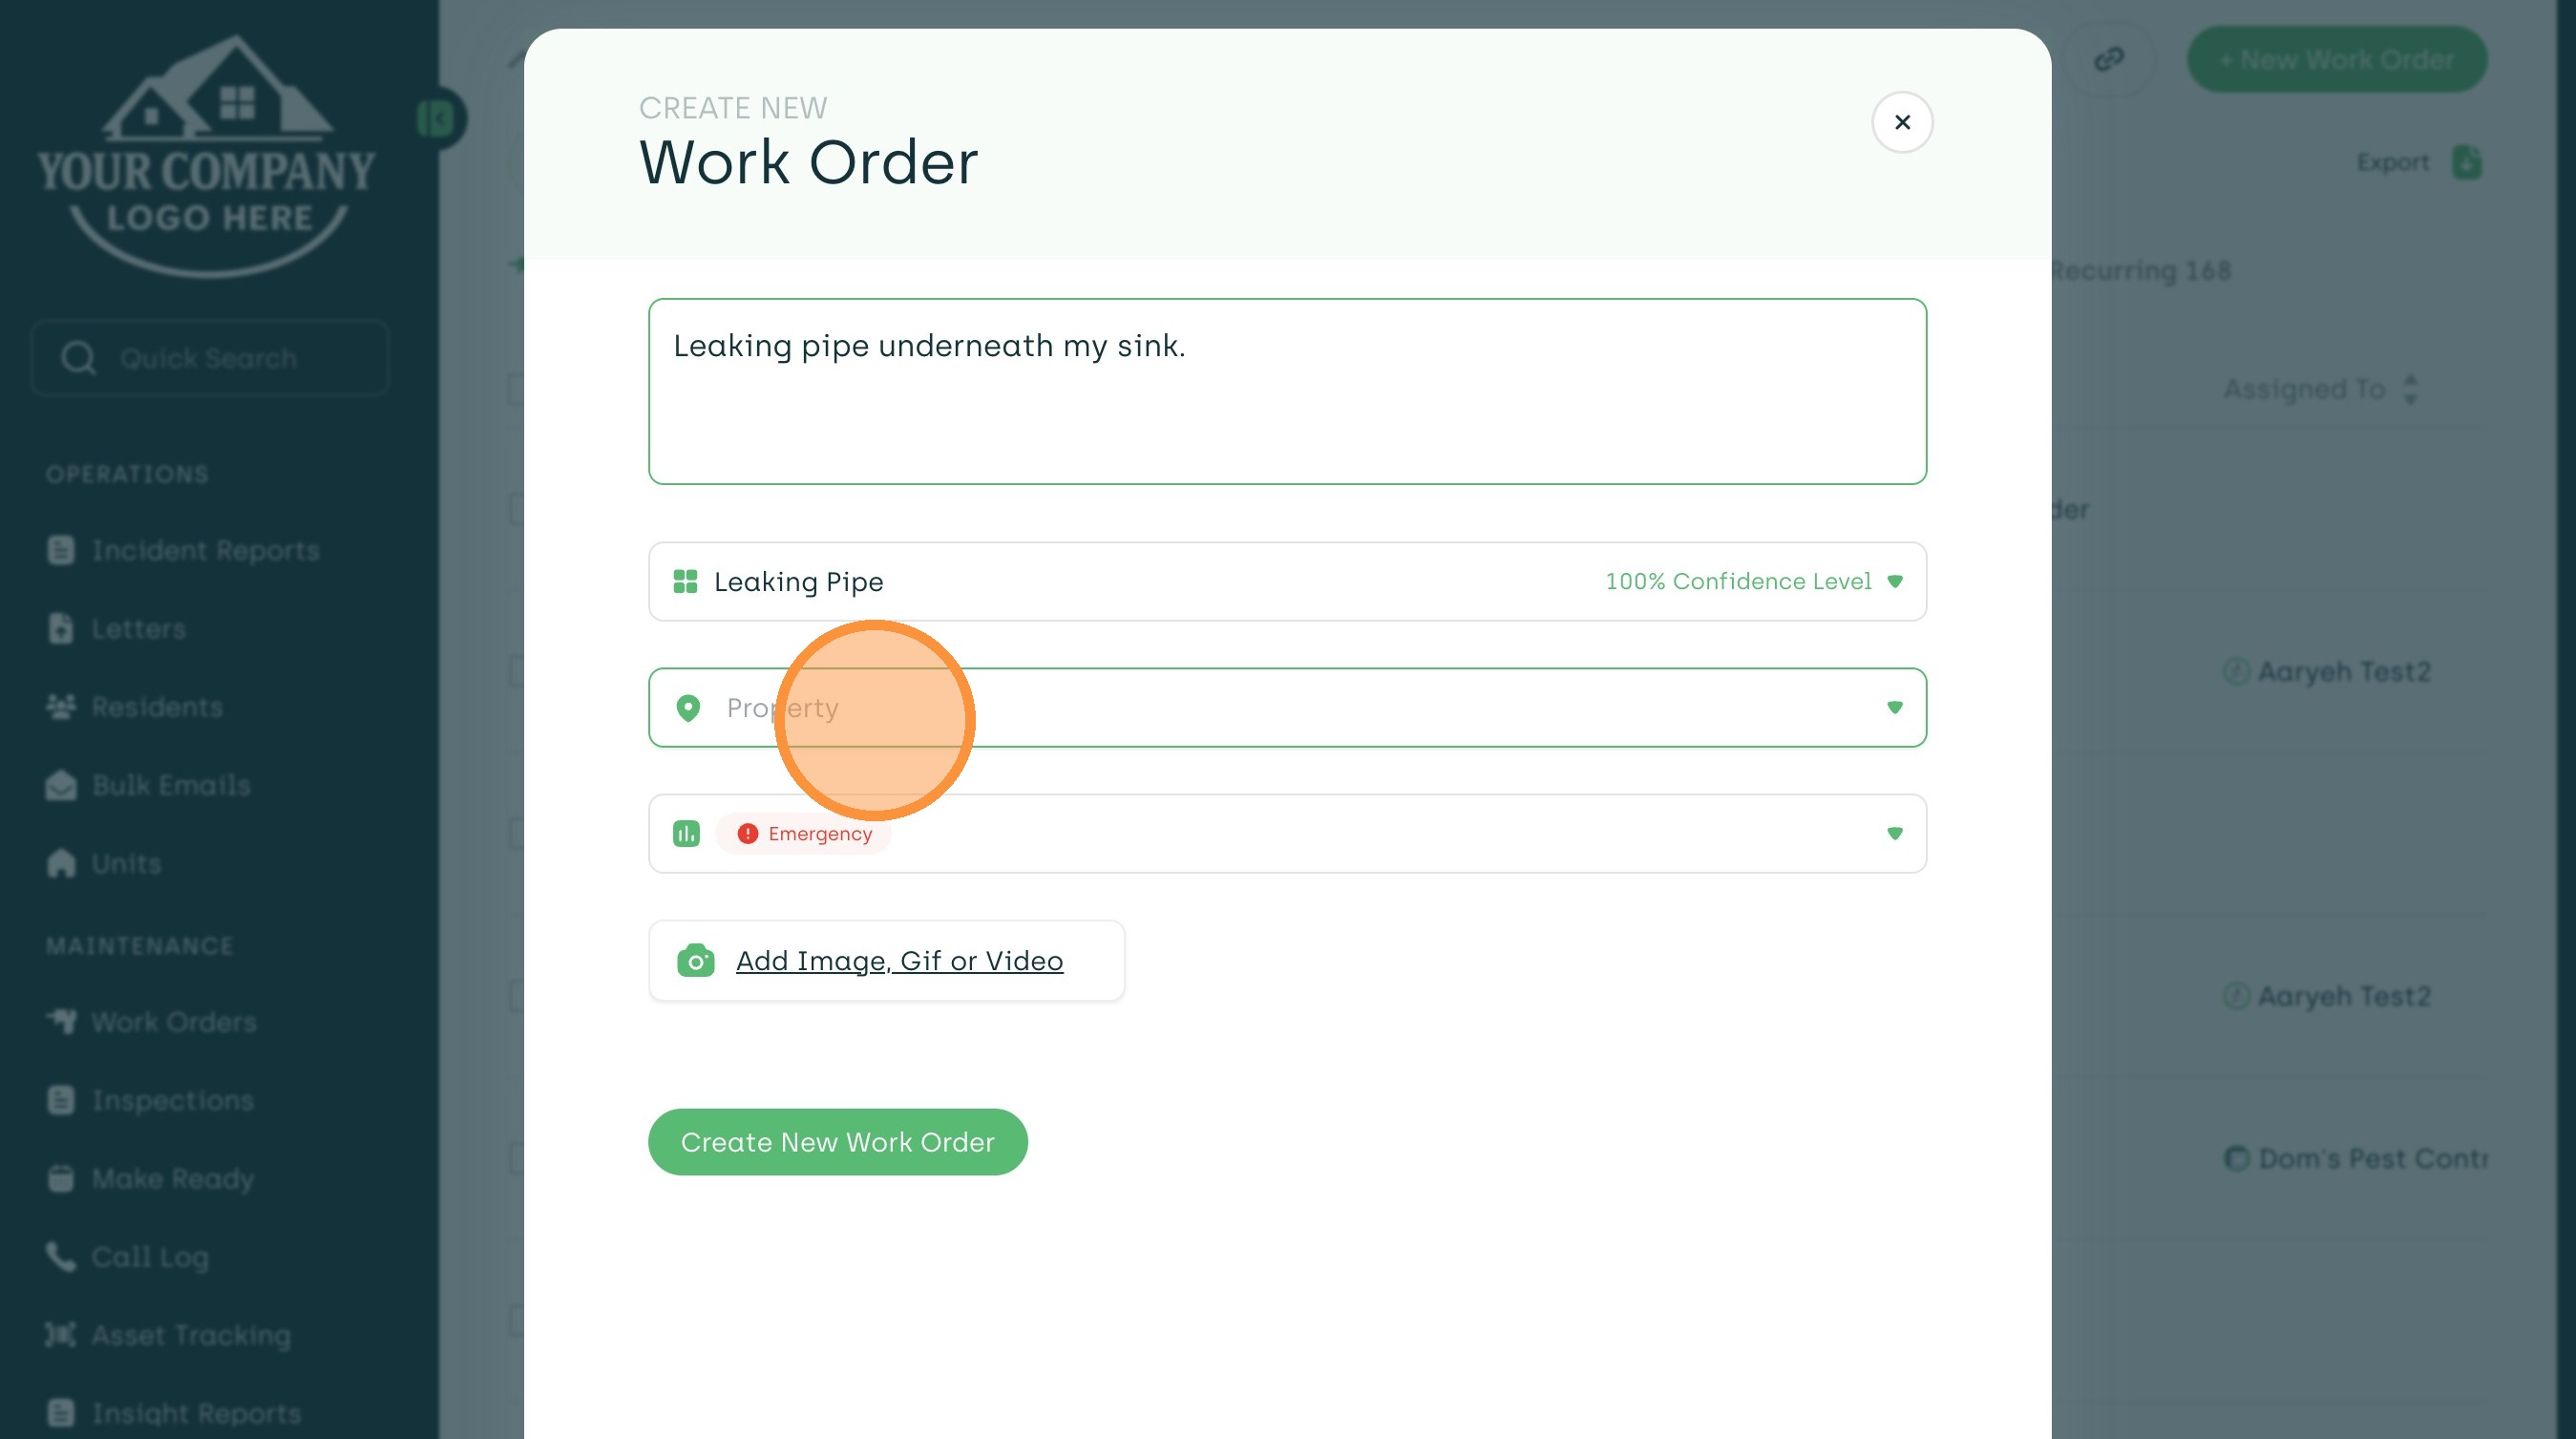
3. Describe the work order with as many details as possible.
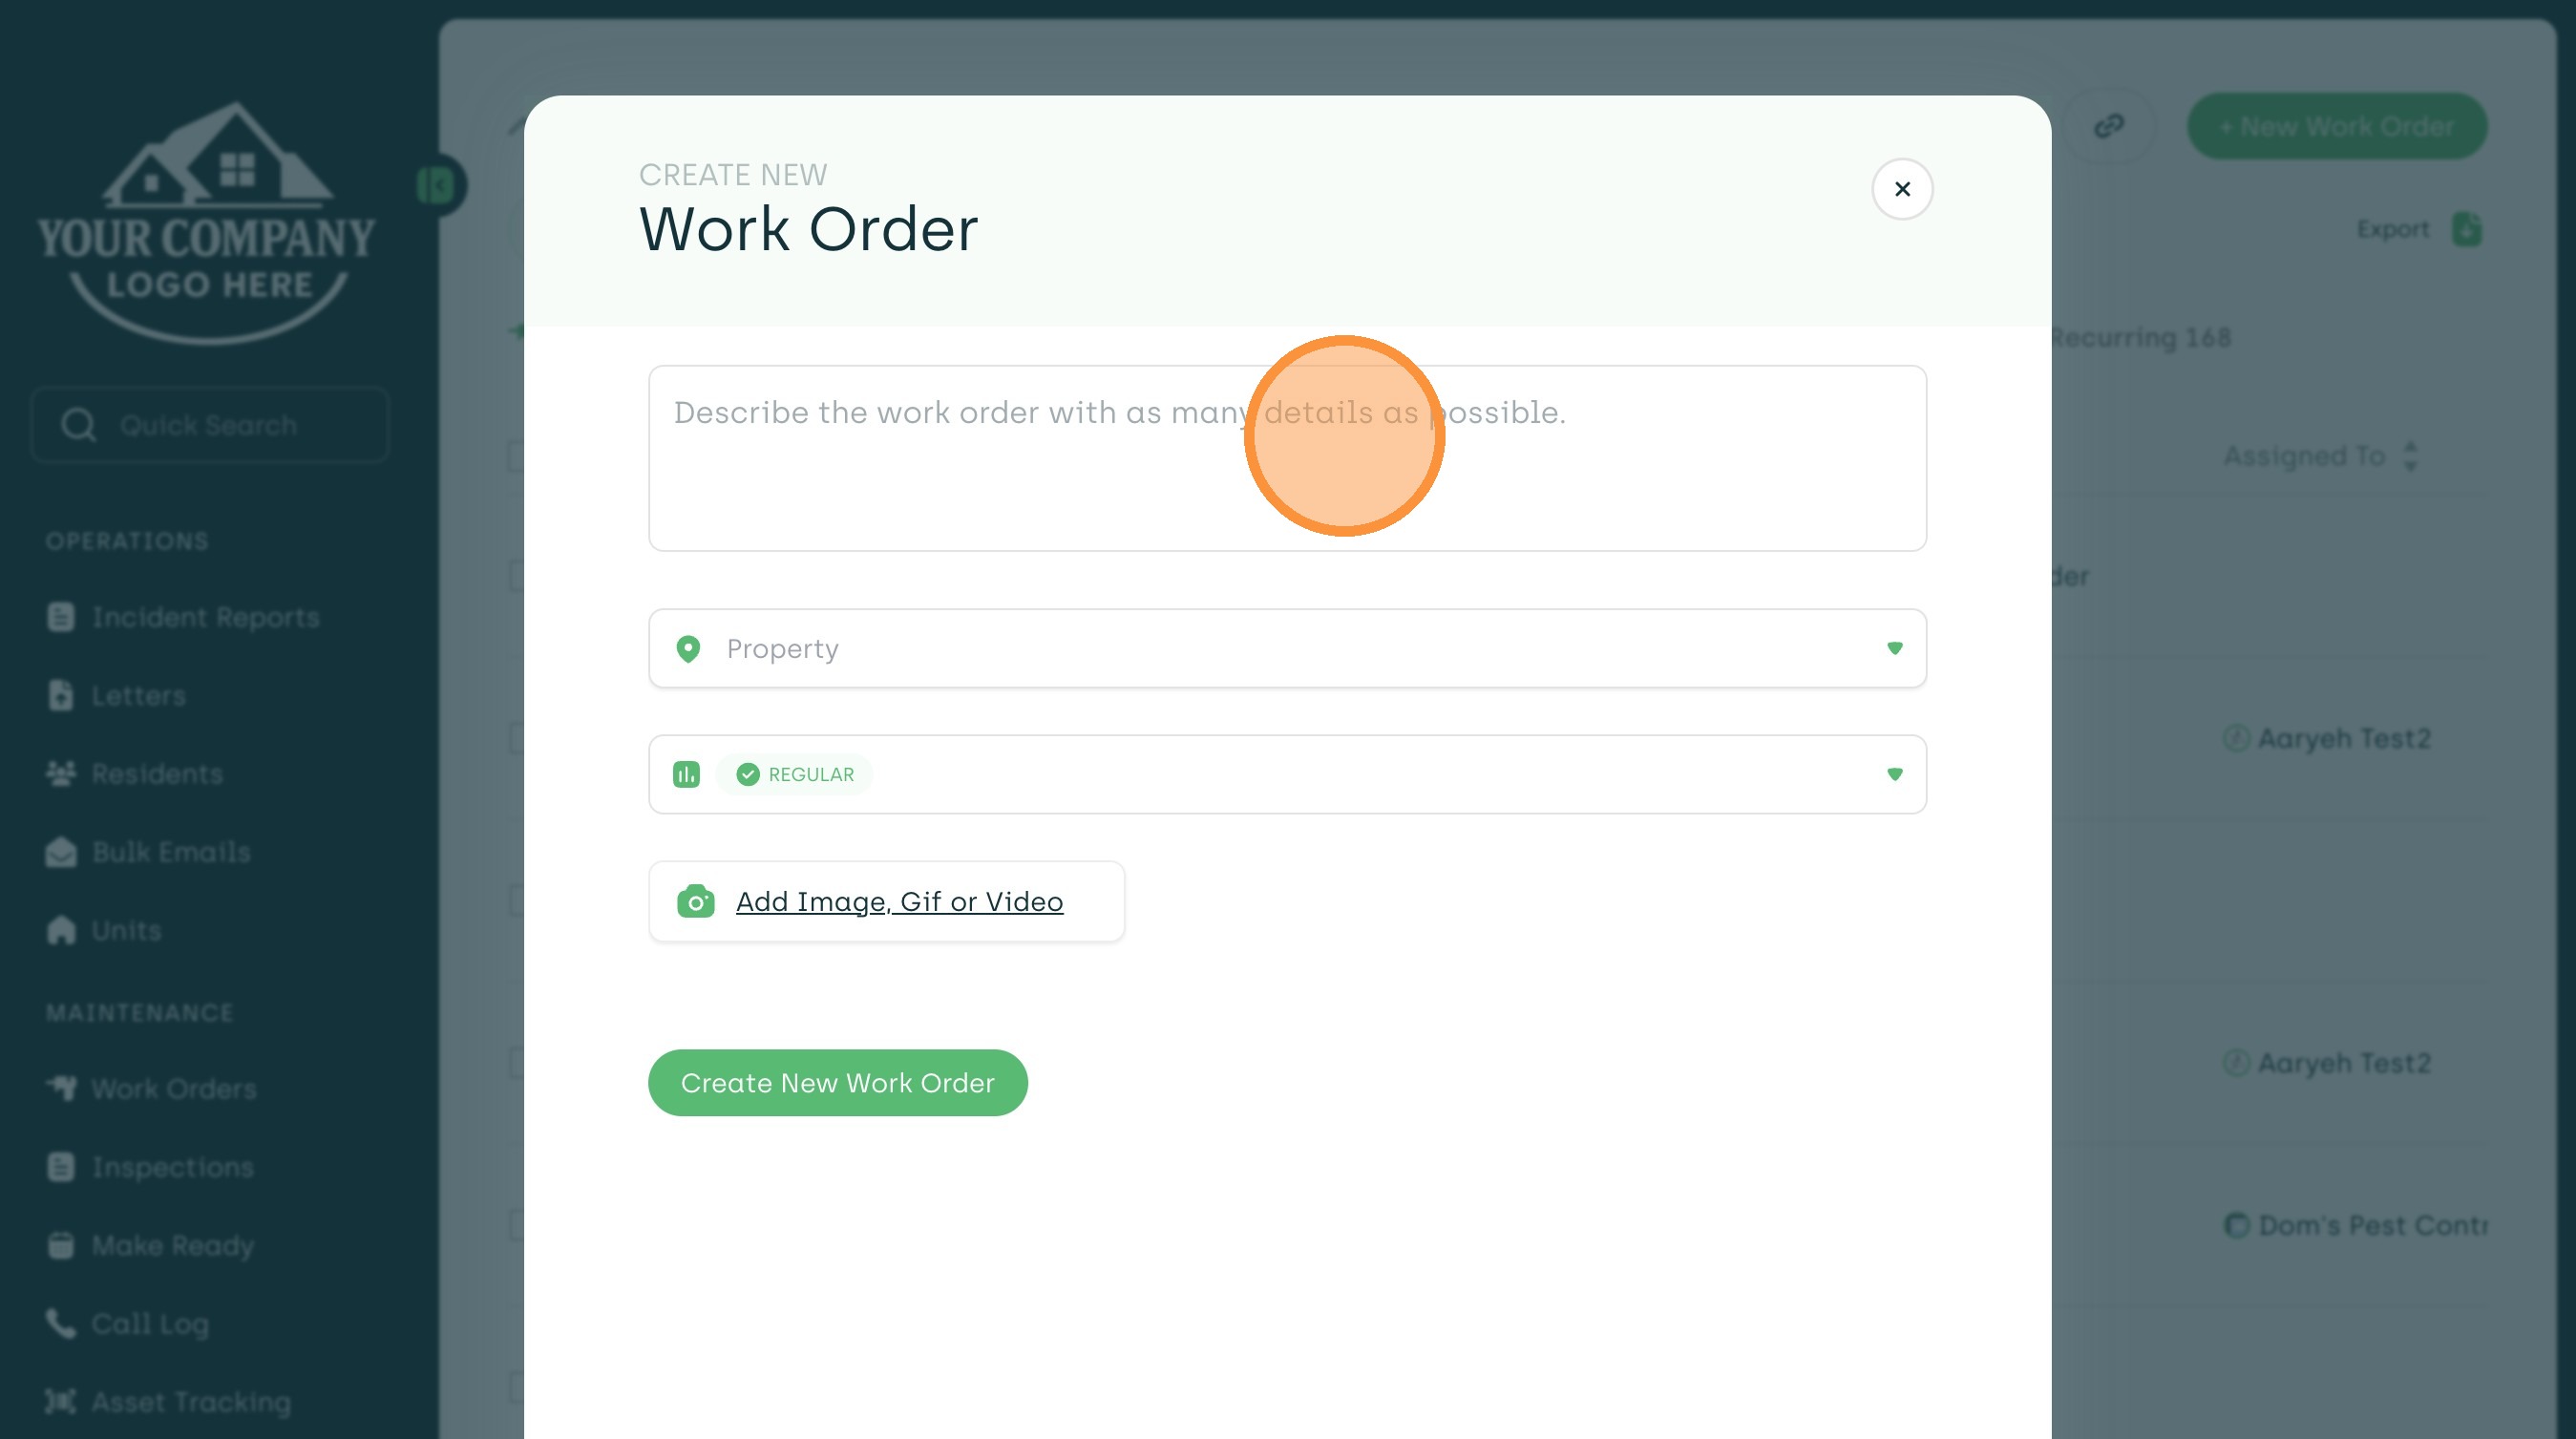
4. The category will automatically populate once the description is complete. In this example, " Leaking Pipe " is selected as the category.

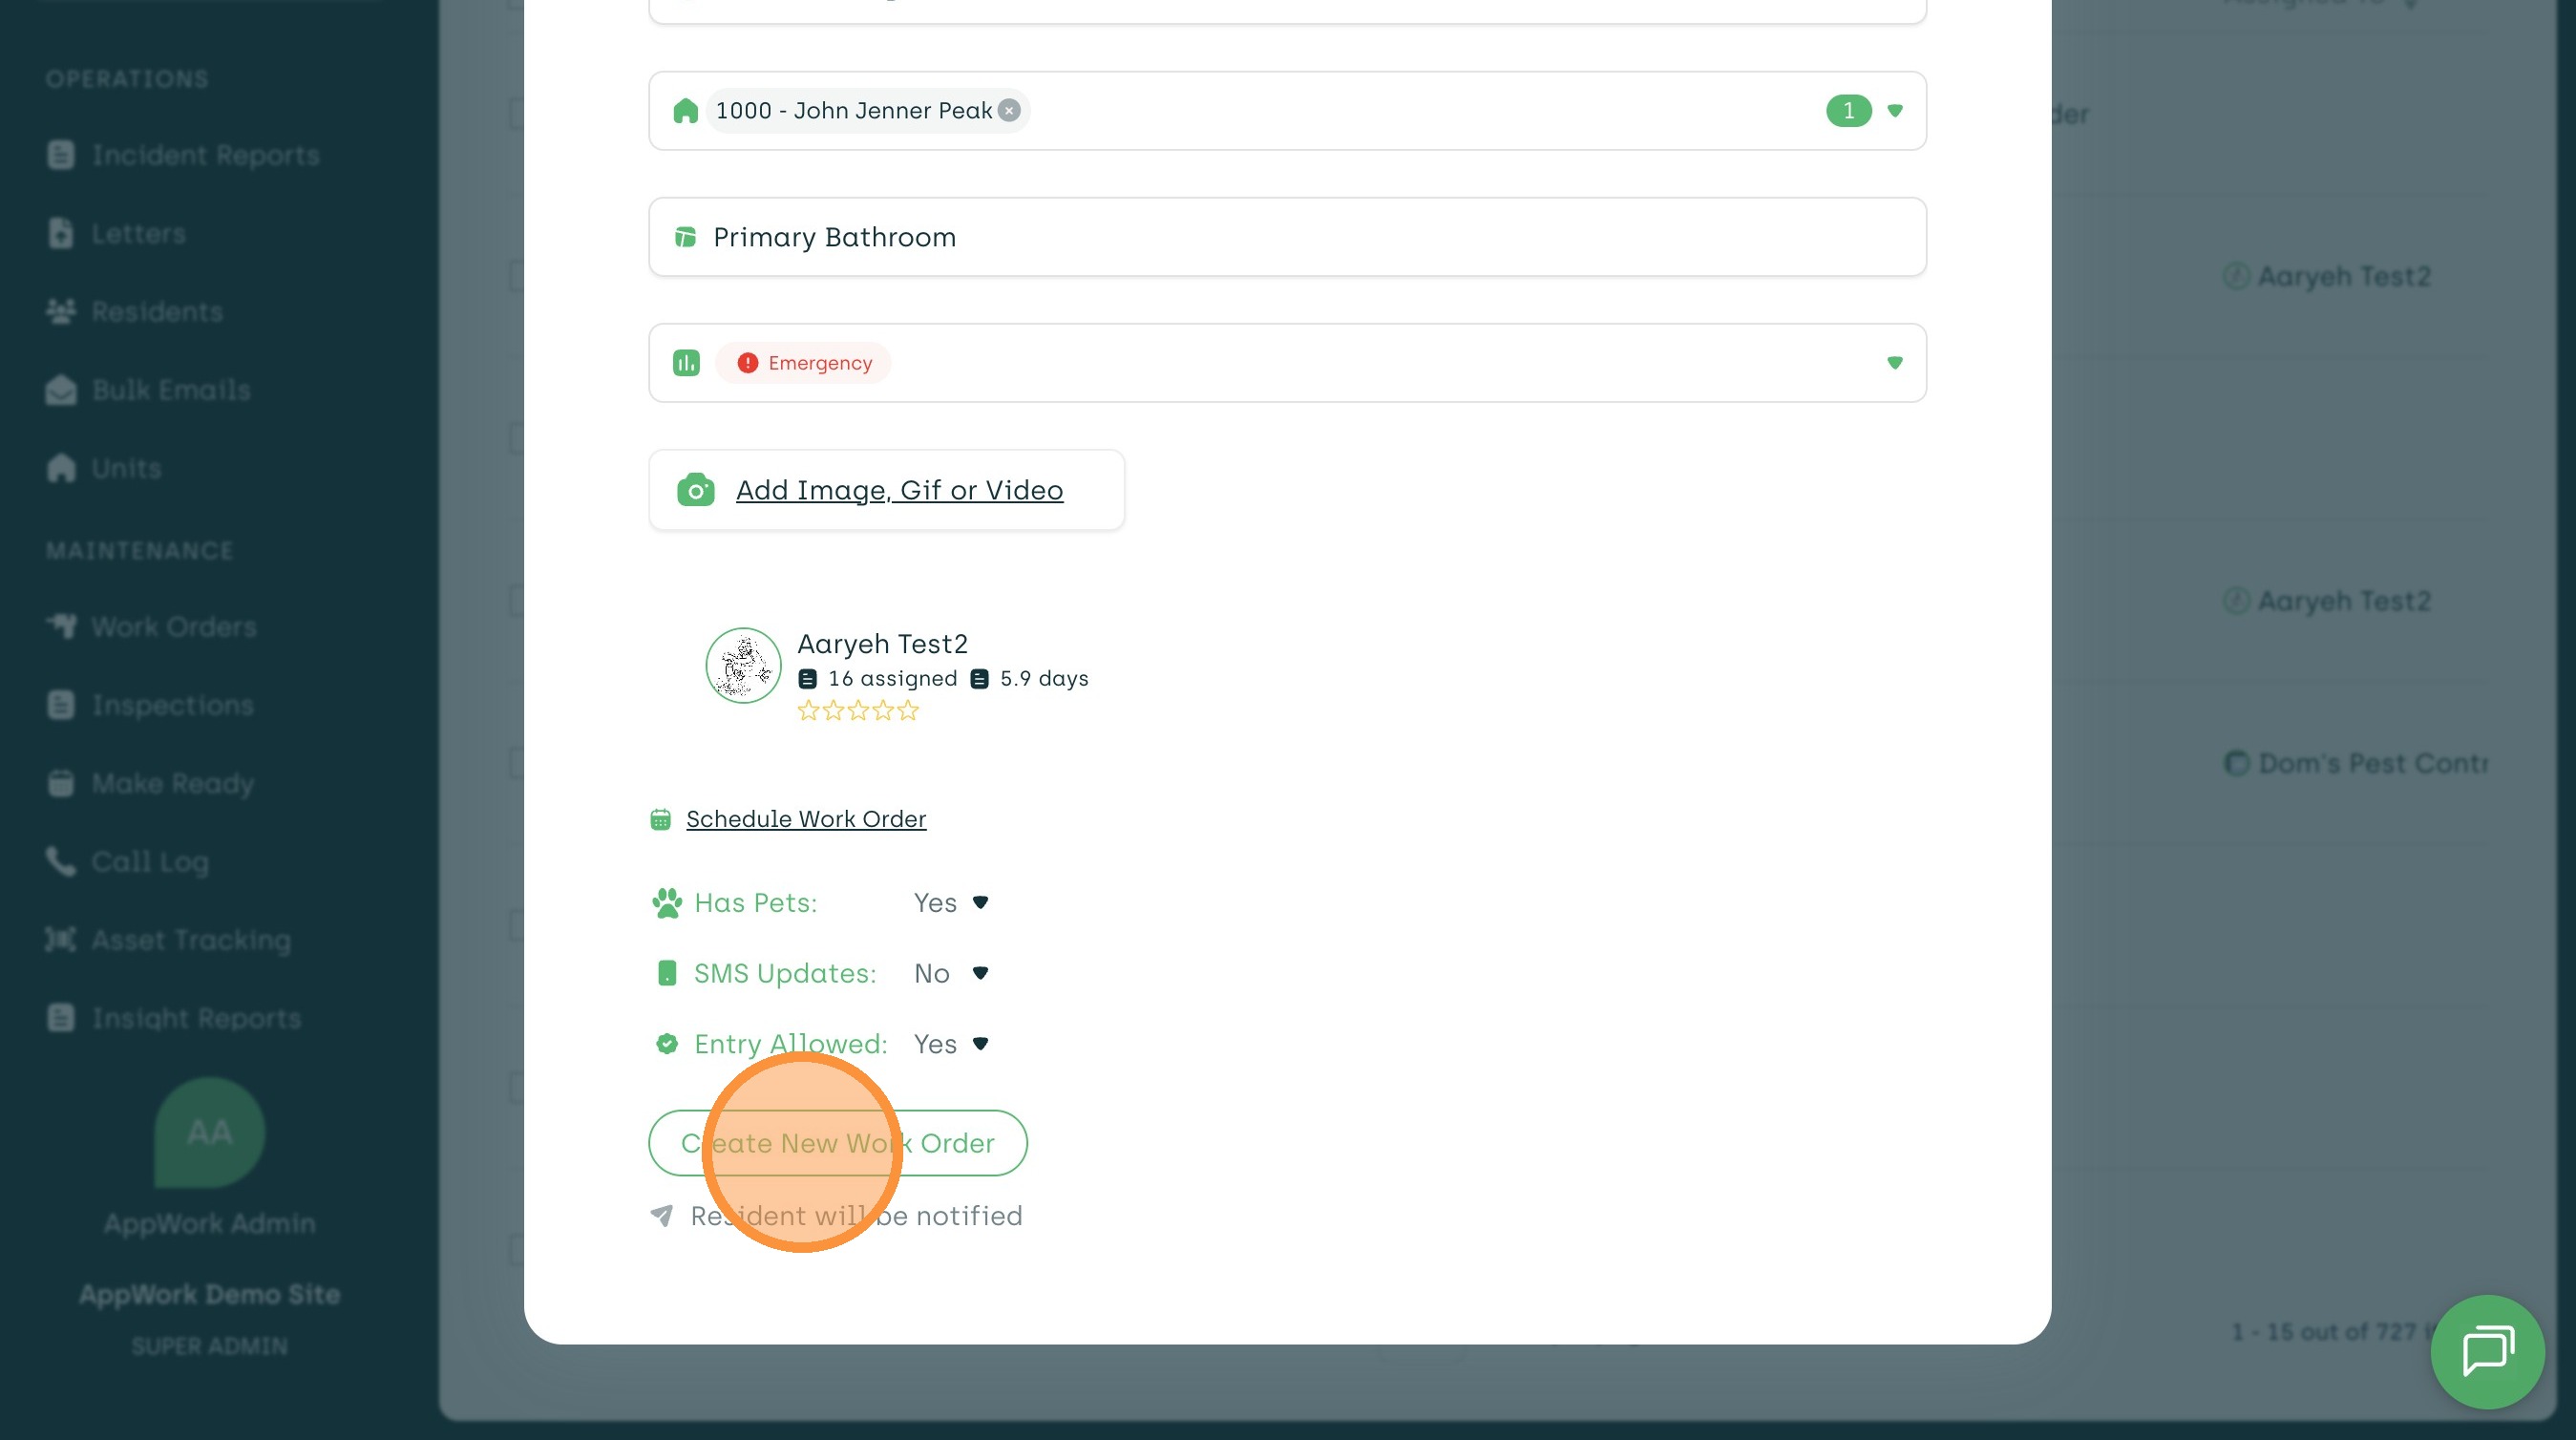
5. Click the "Property" field.
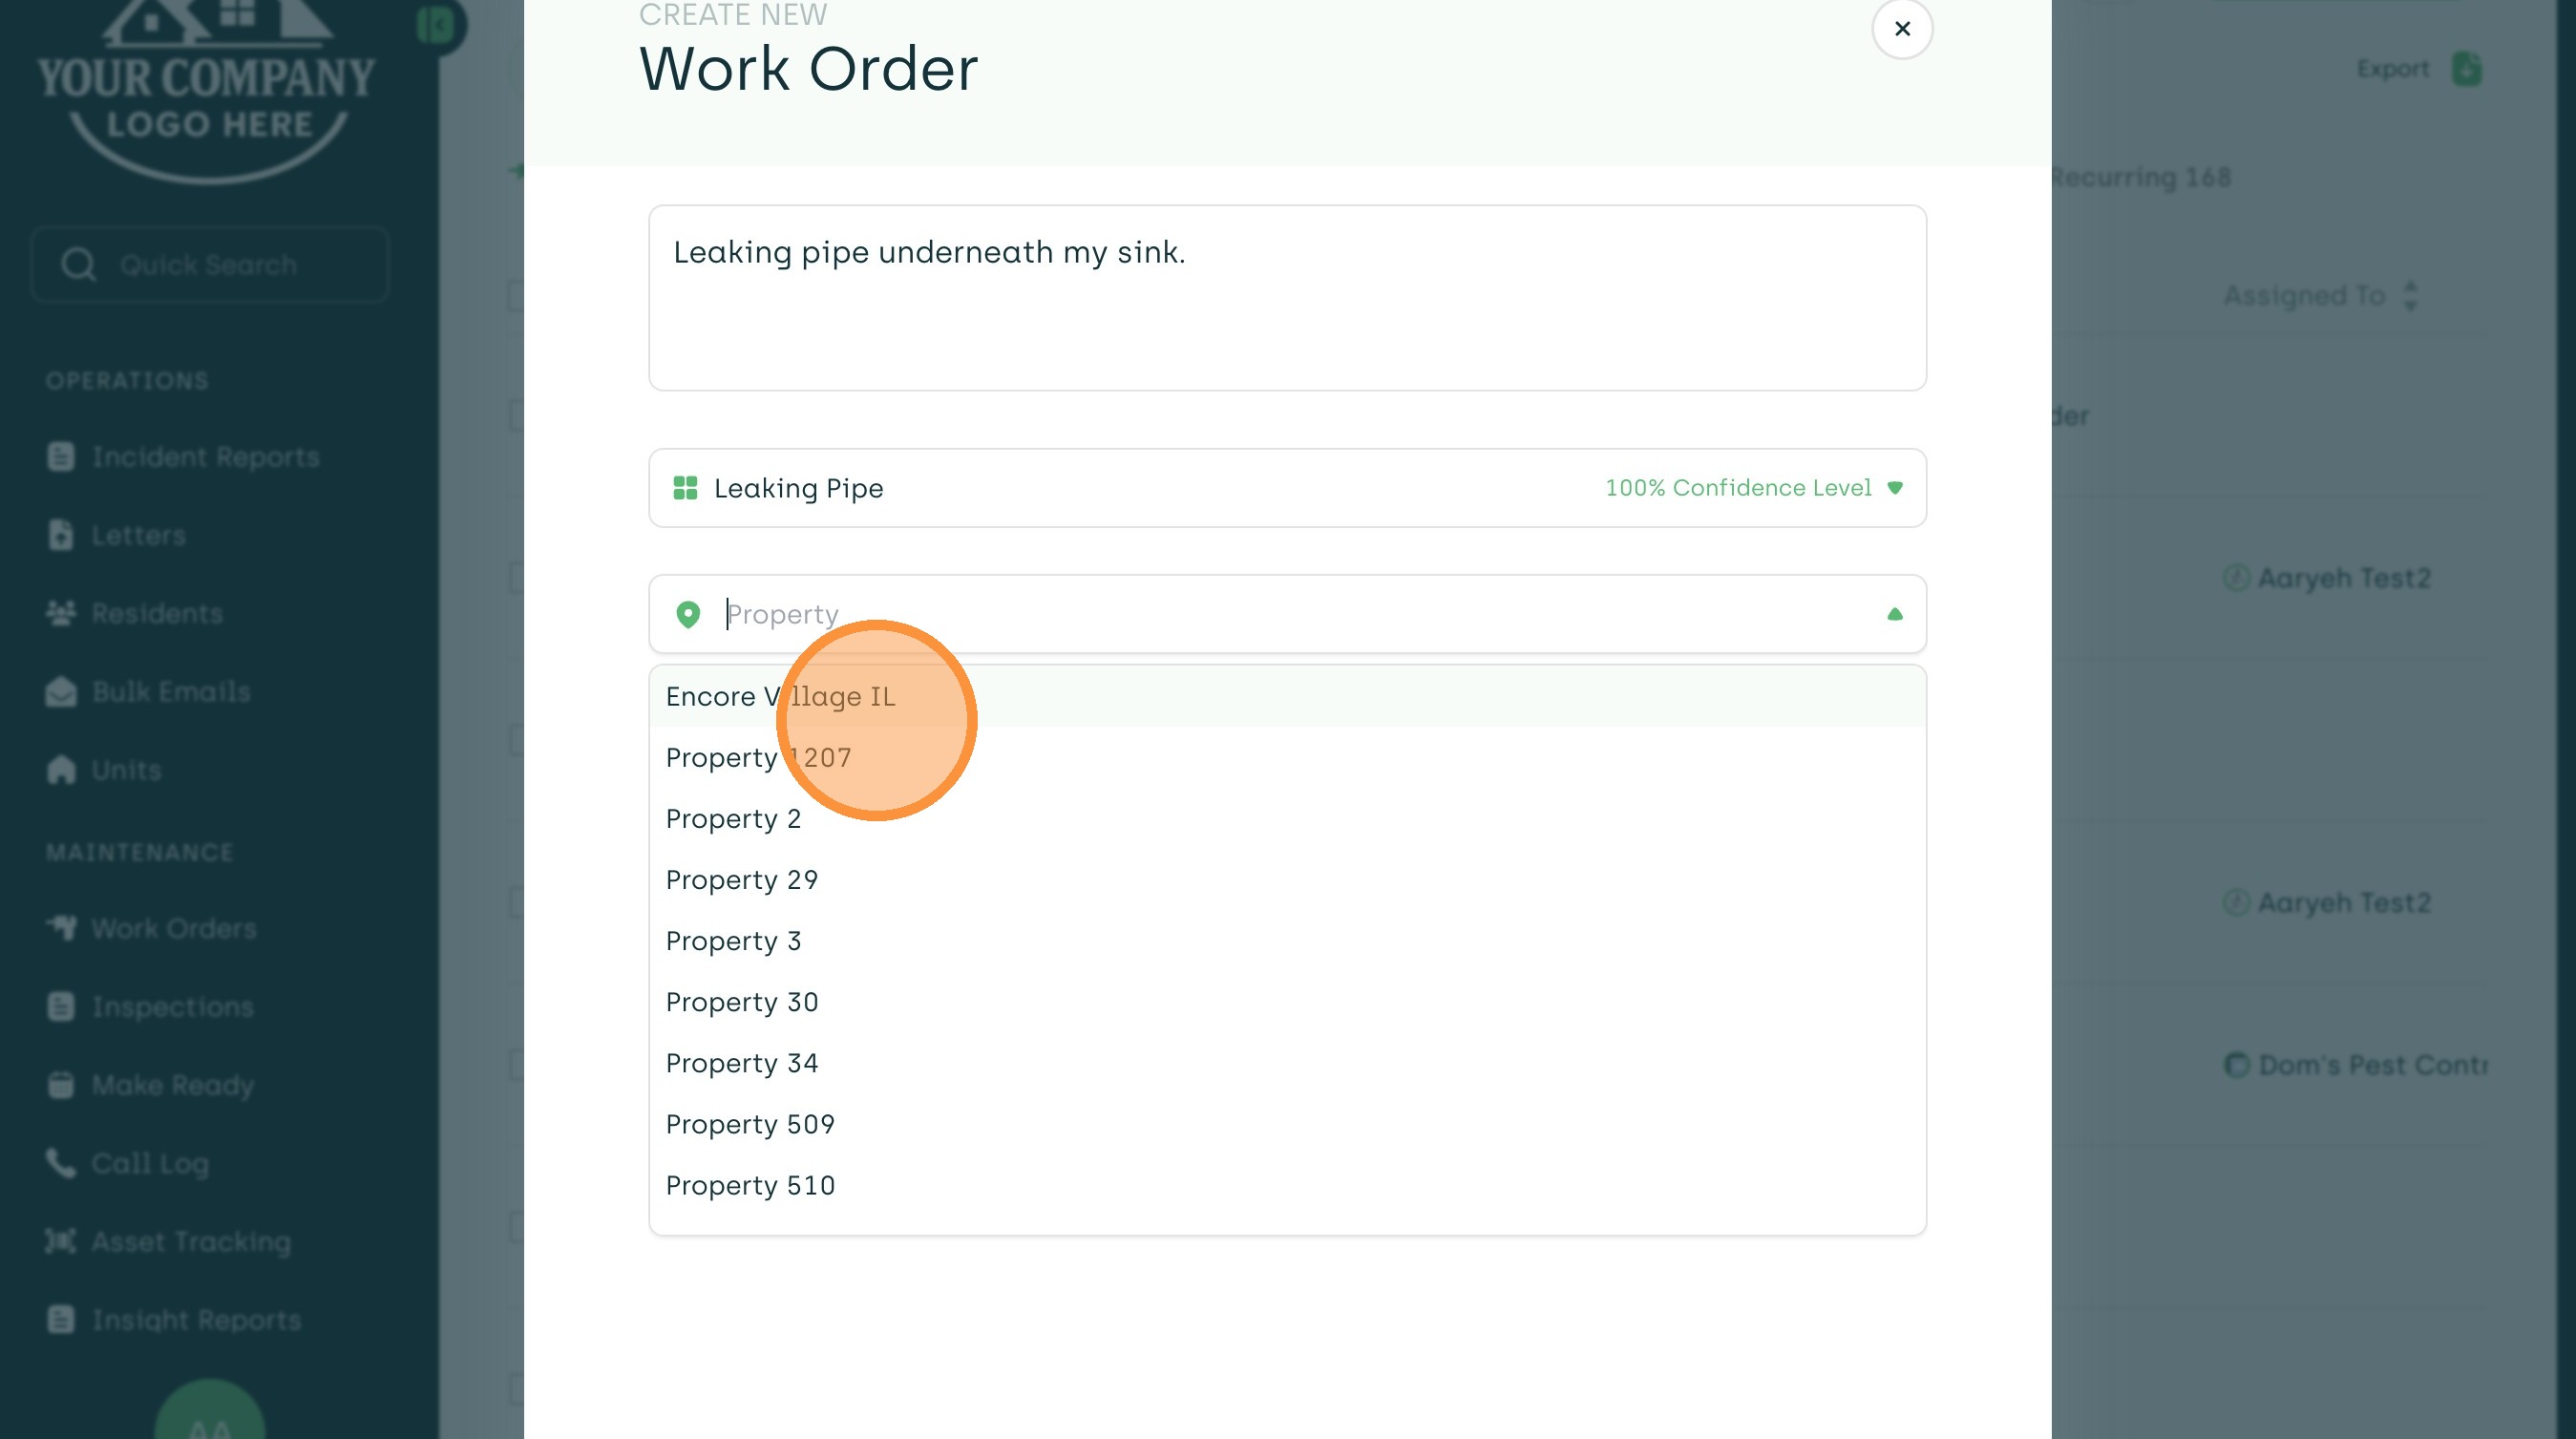
6. Select your desired property from the list. Note: You will only have access to the property(s) you are assigned to.
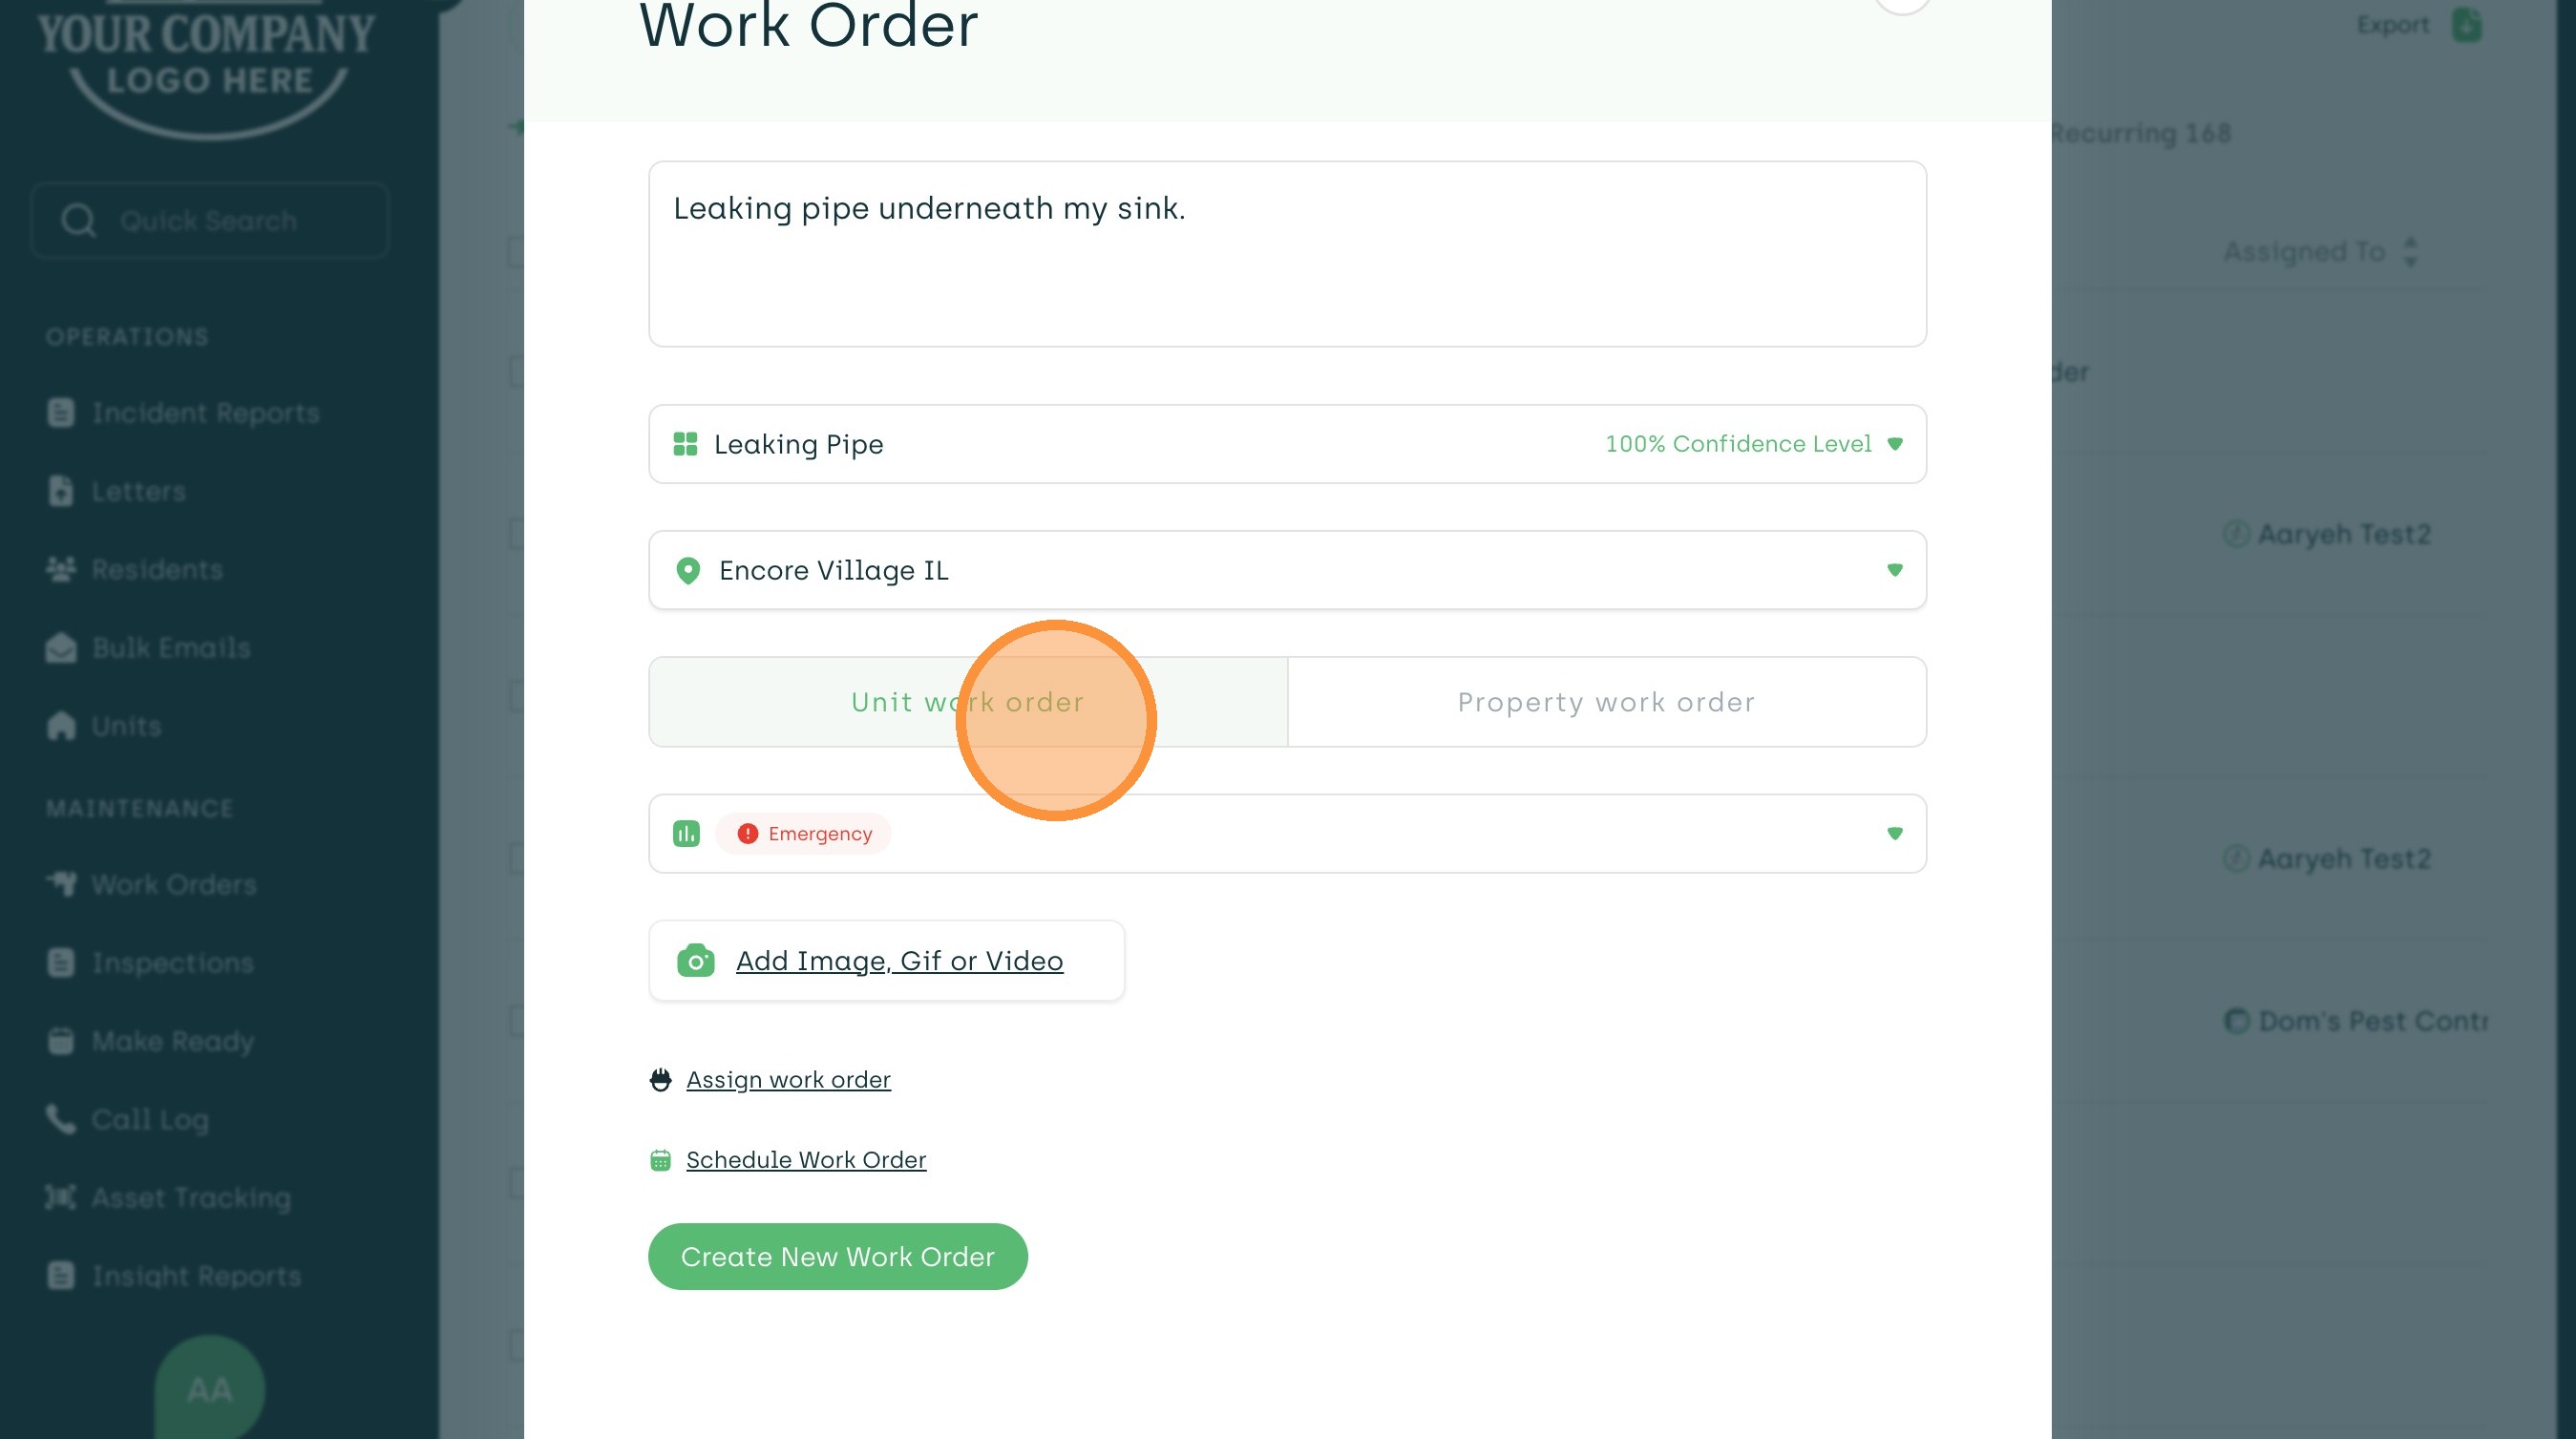
7. In this example, we are dealing with a leaking pipe in a specific unit, so select "Unit Work order".
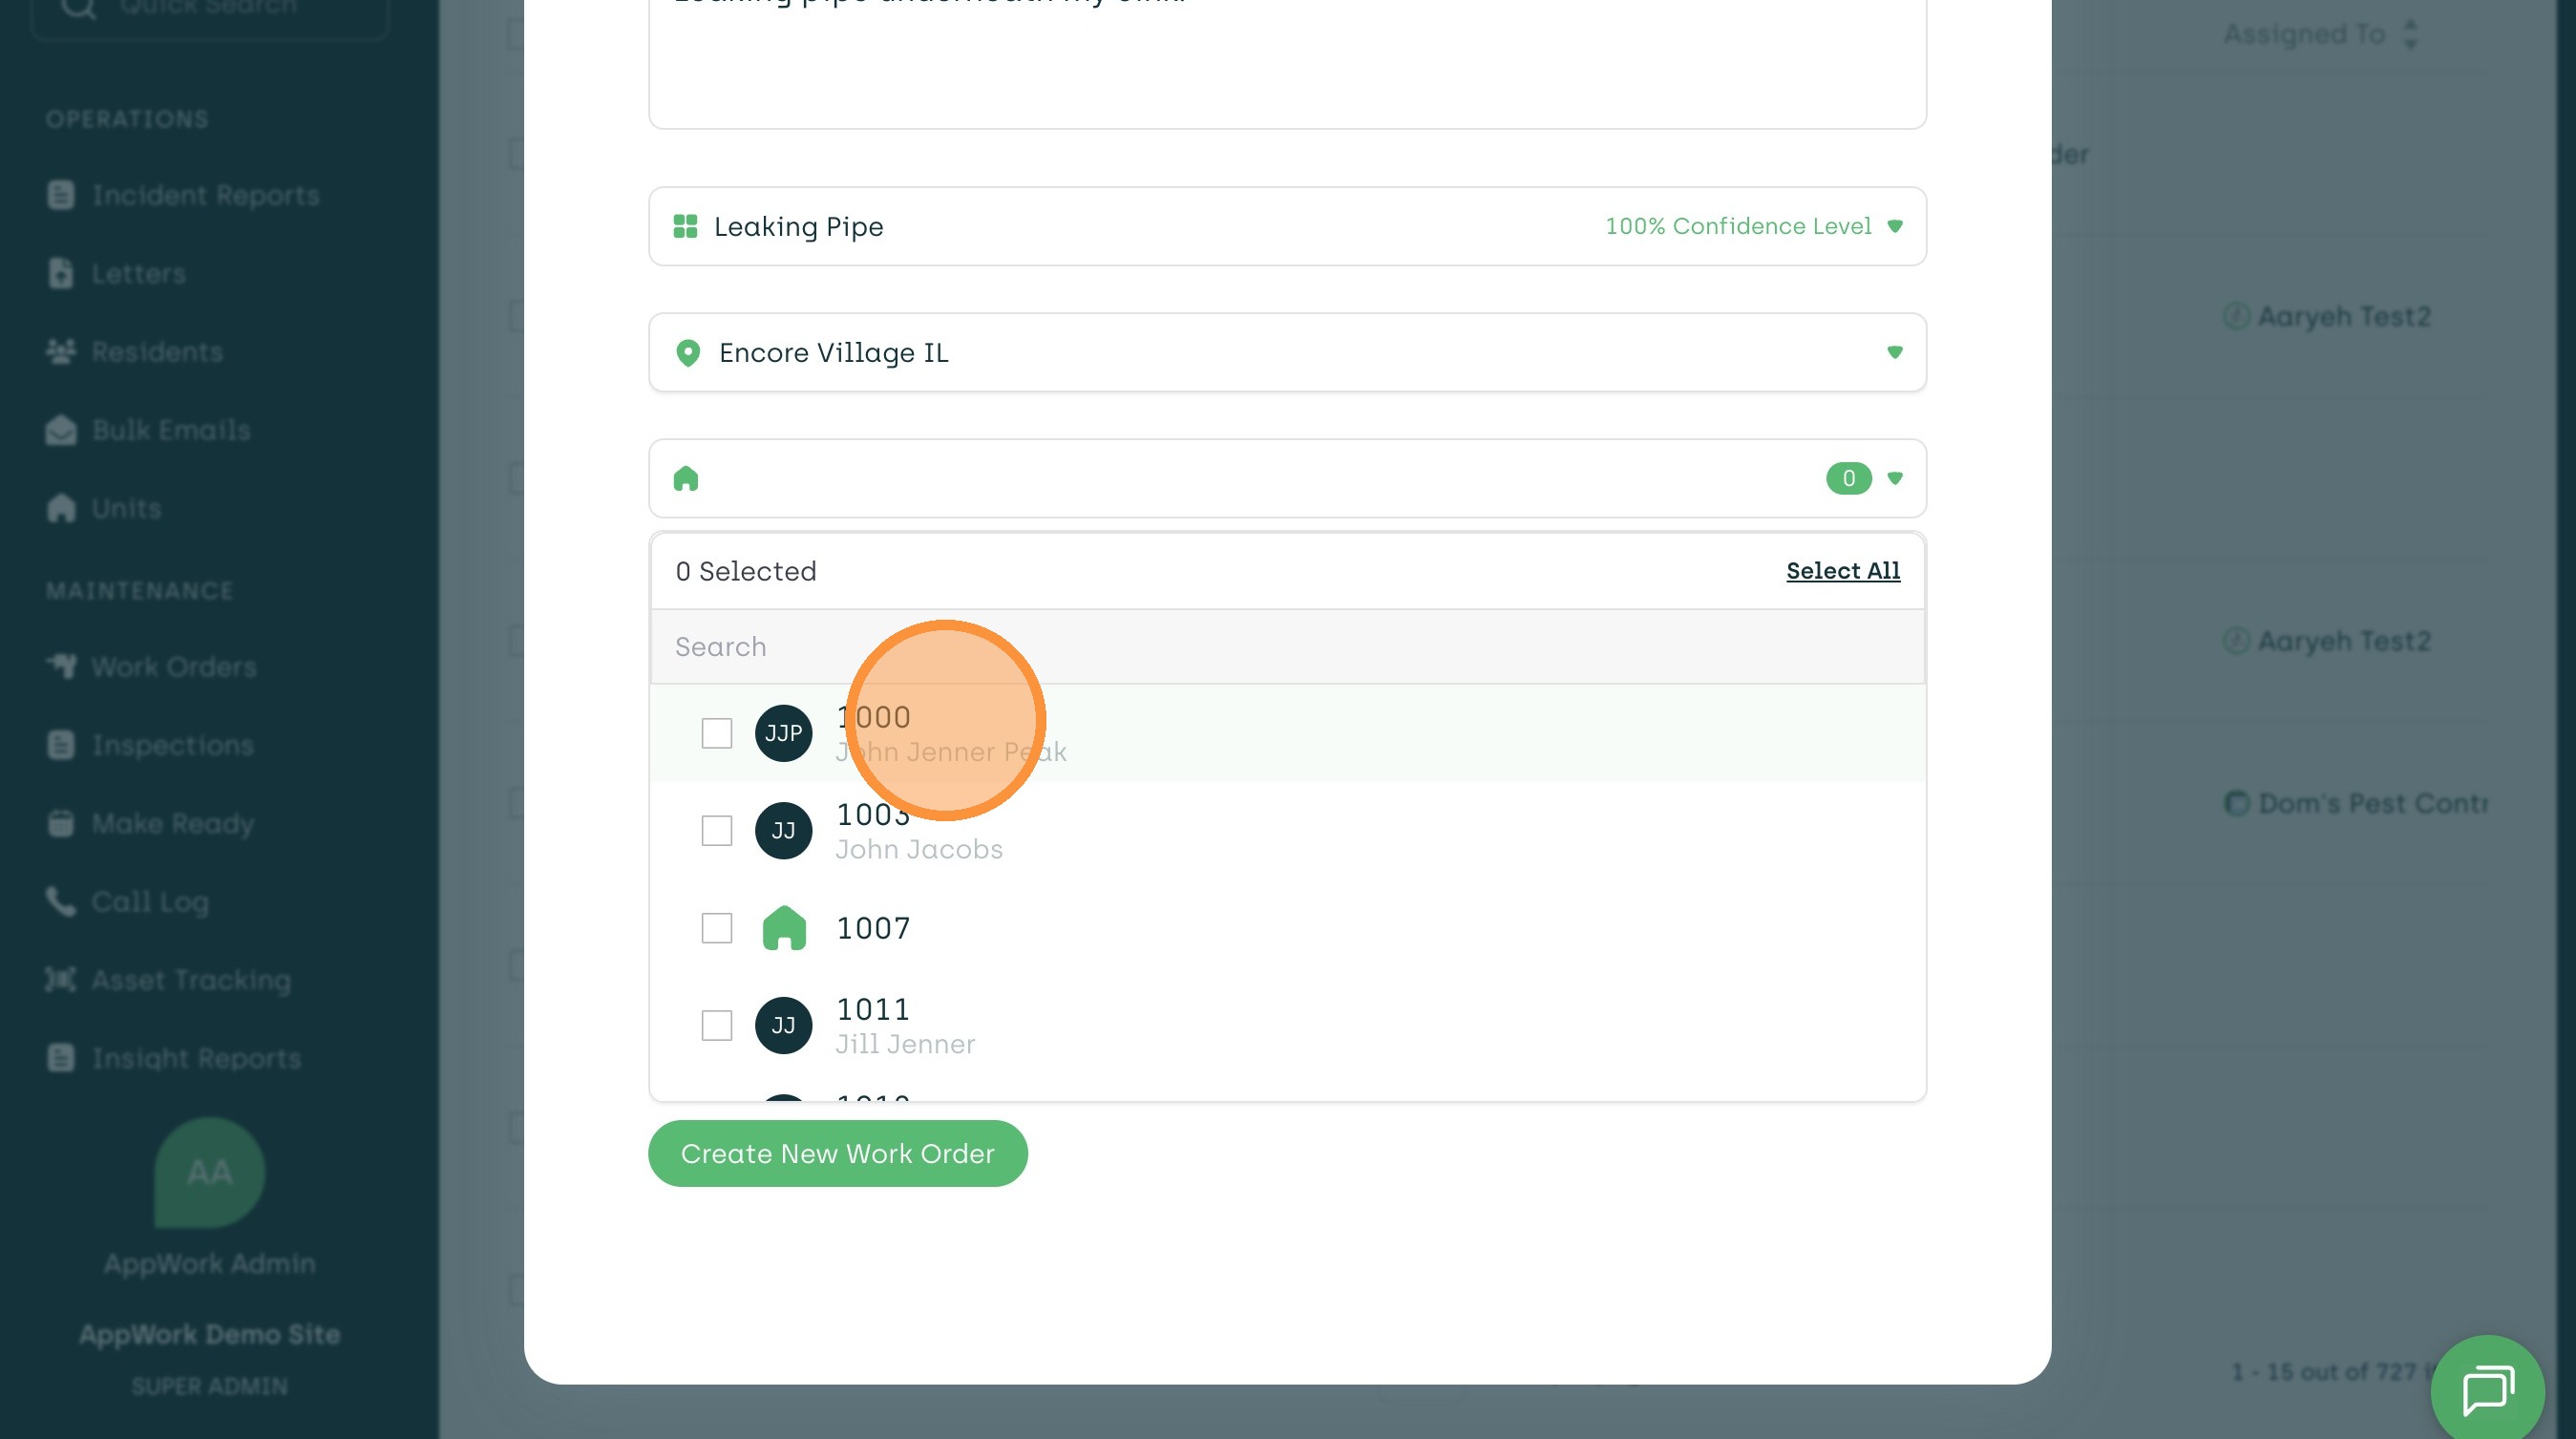
8. Select the desired unit. Note: You can use the search bar to search by the unit number or the tenant's name to speed this process up.
9. Once you have a unit selected, you can now add a location within the unit to specify which fixture(s) are affected.
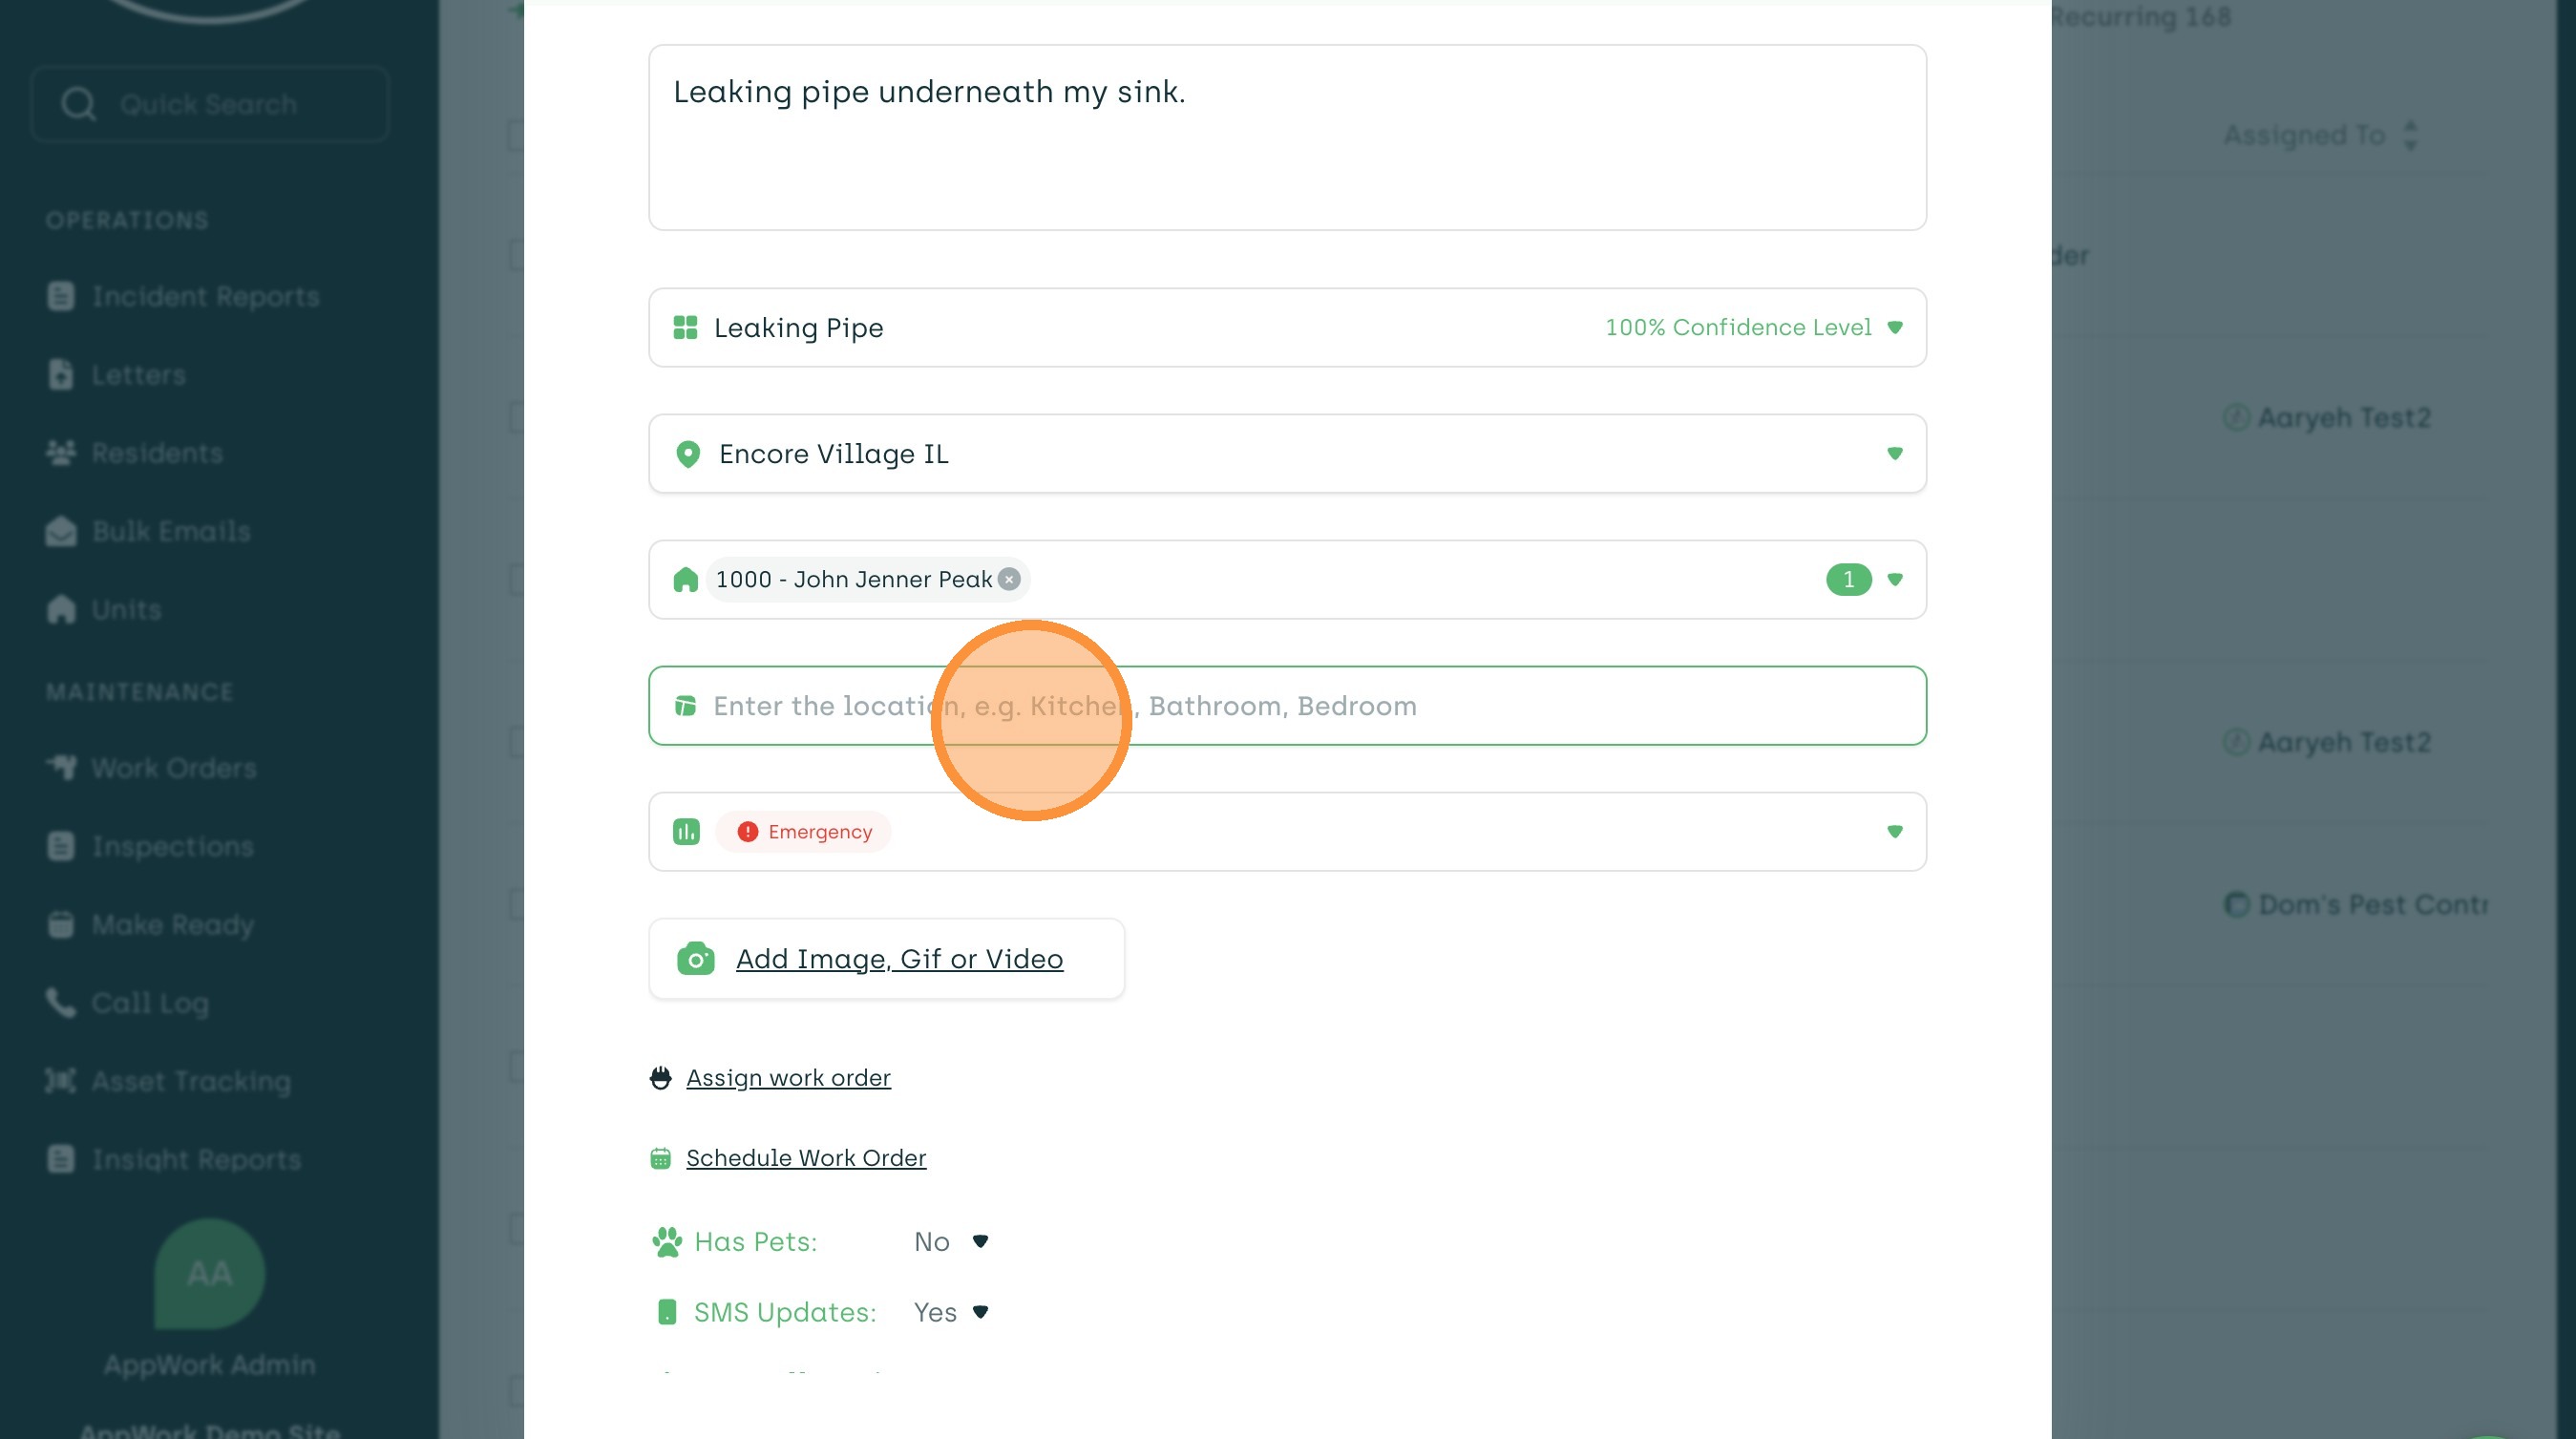
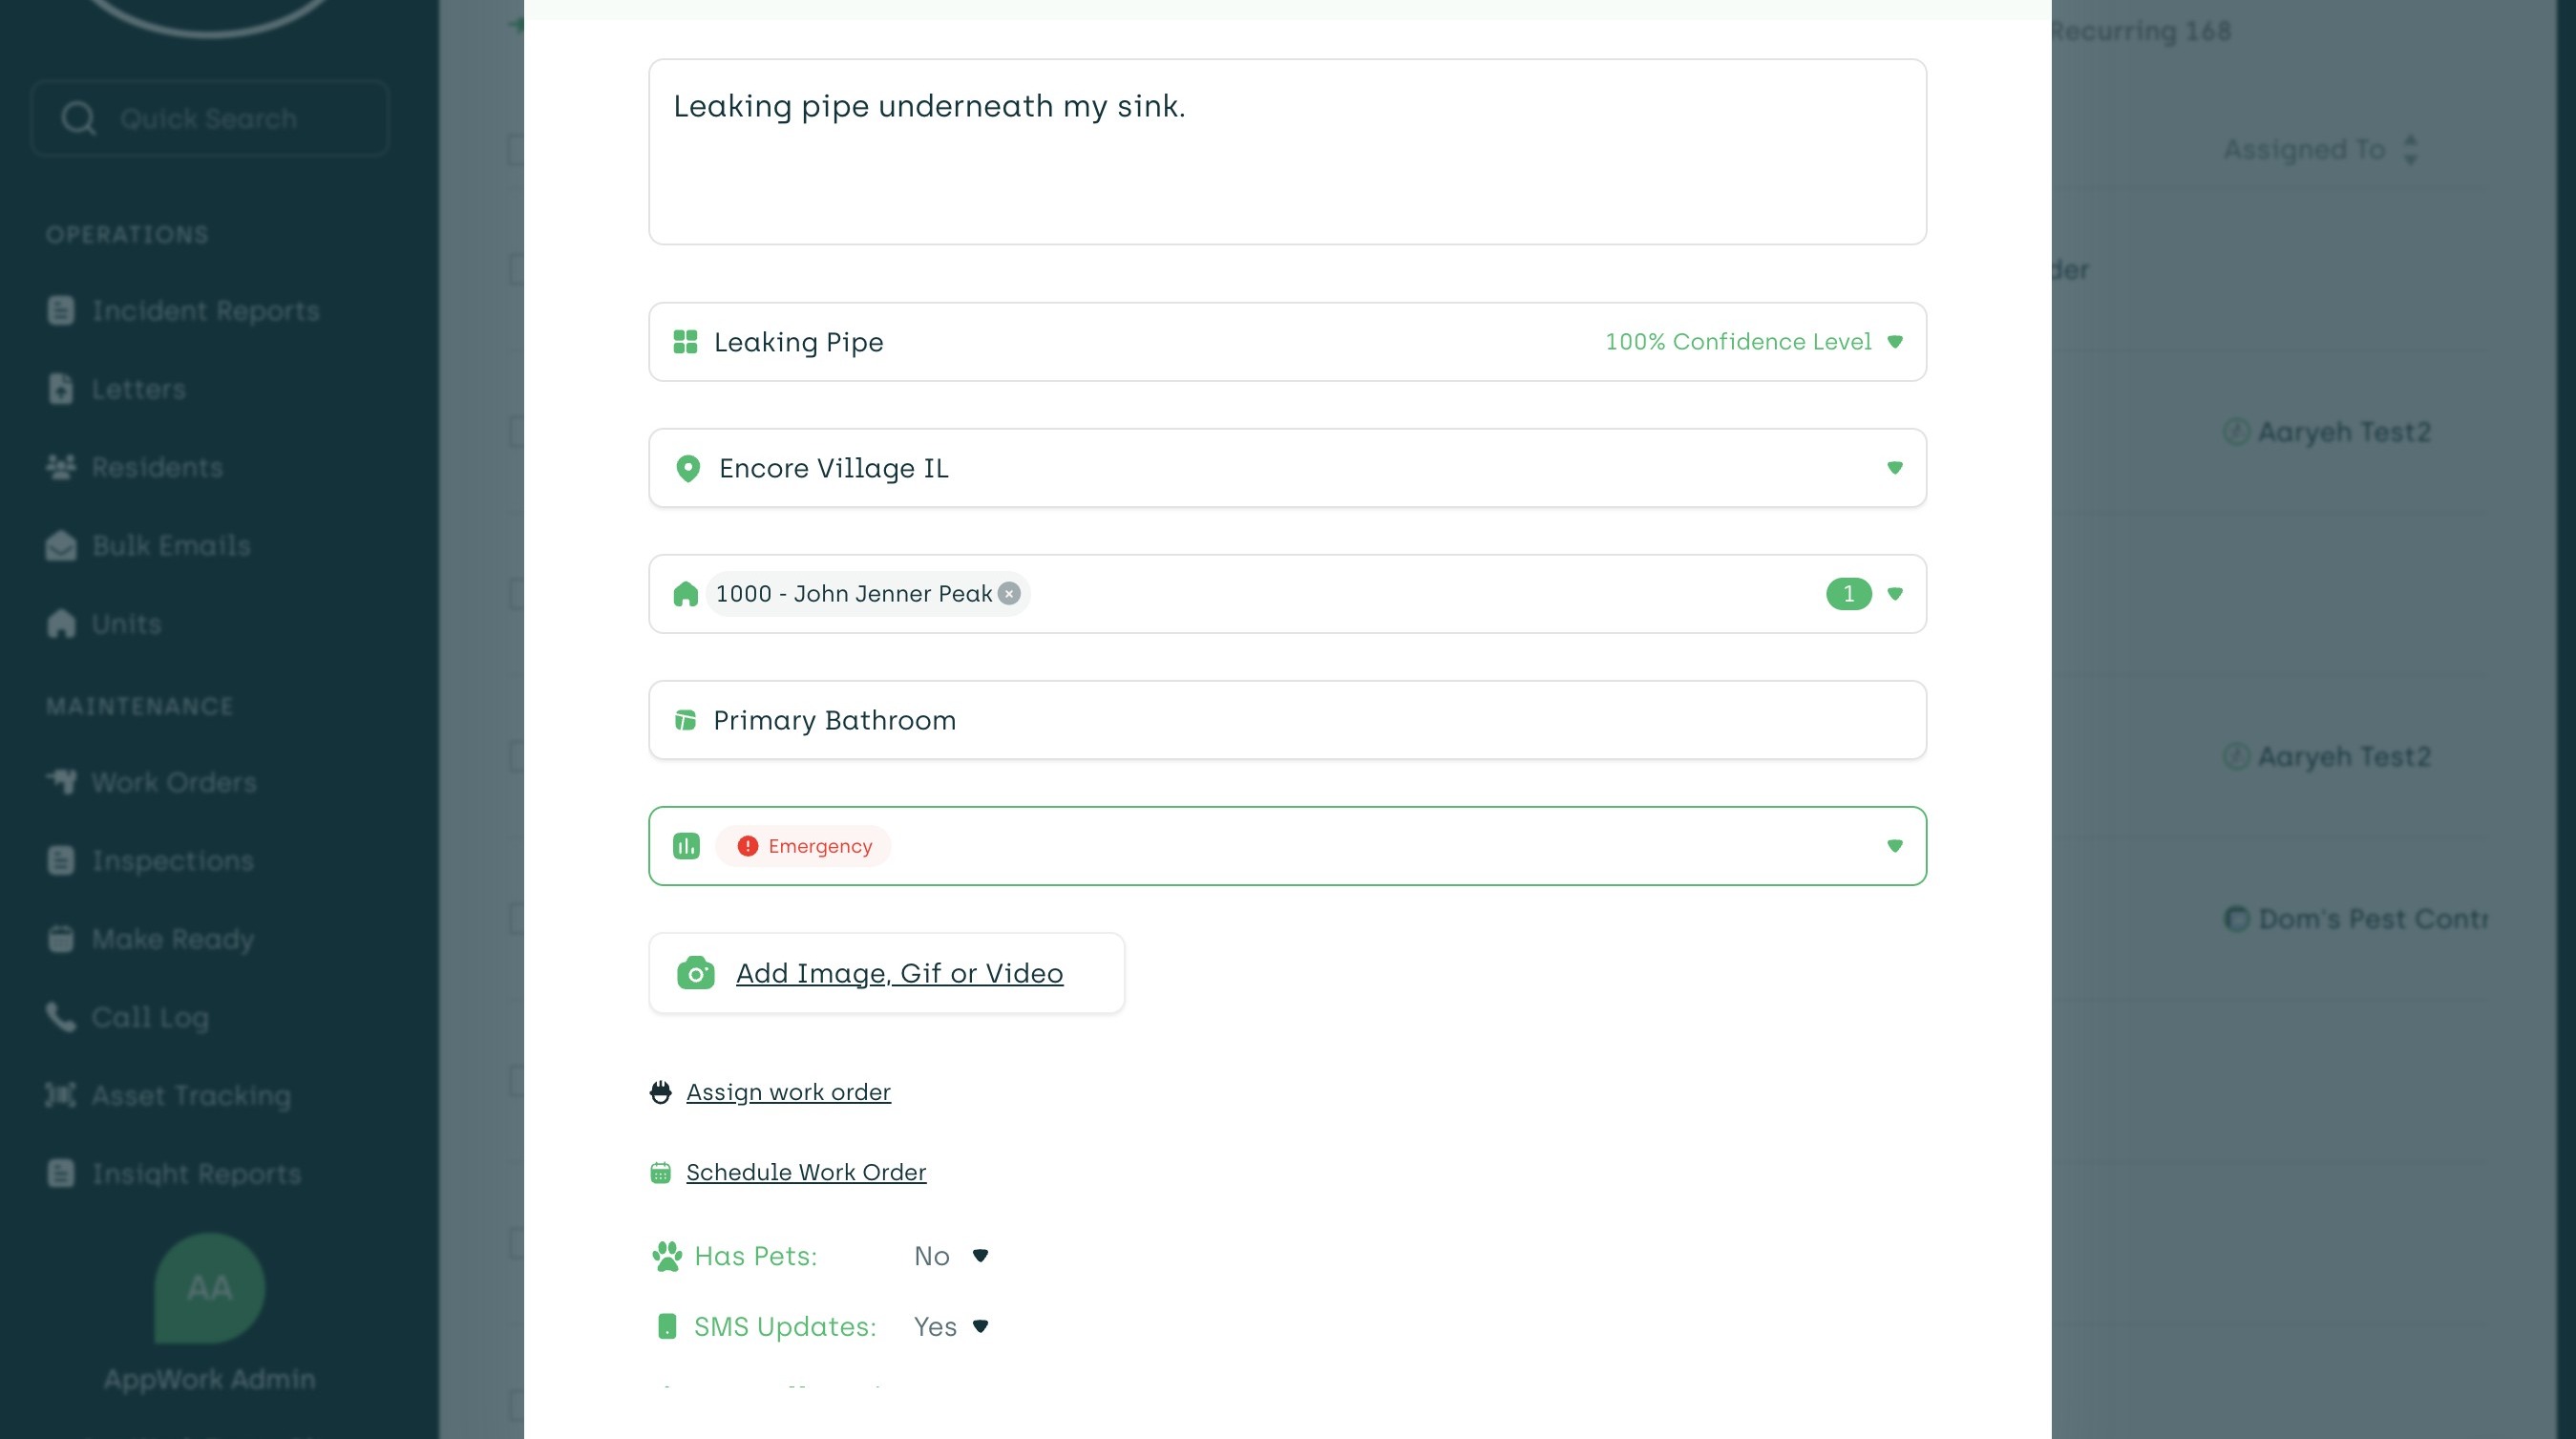
10. In this example we'll use the primary bathroom as the location.
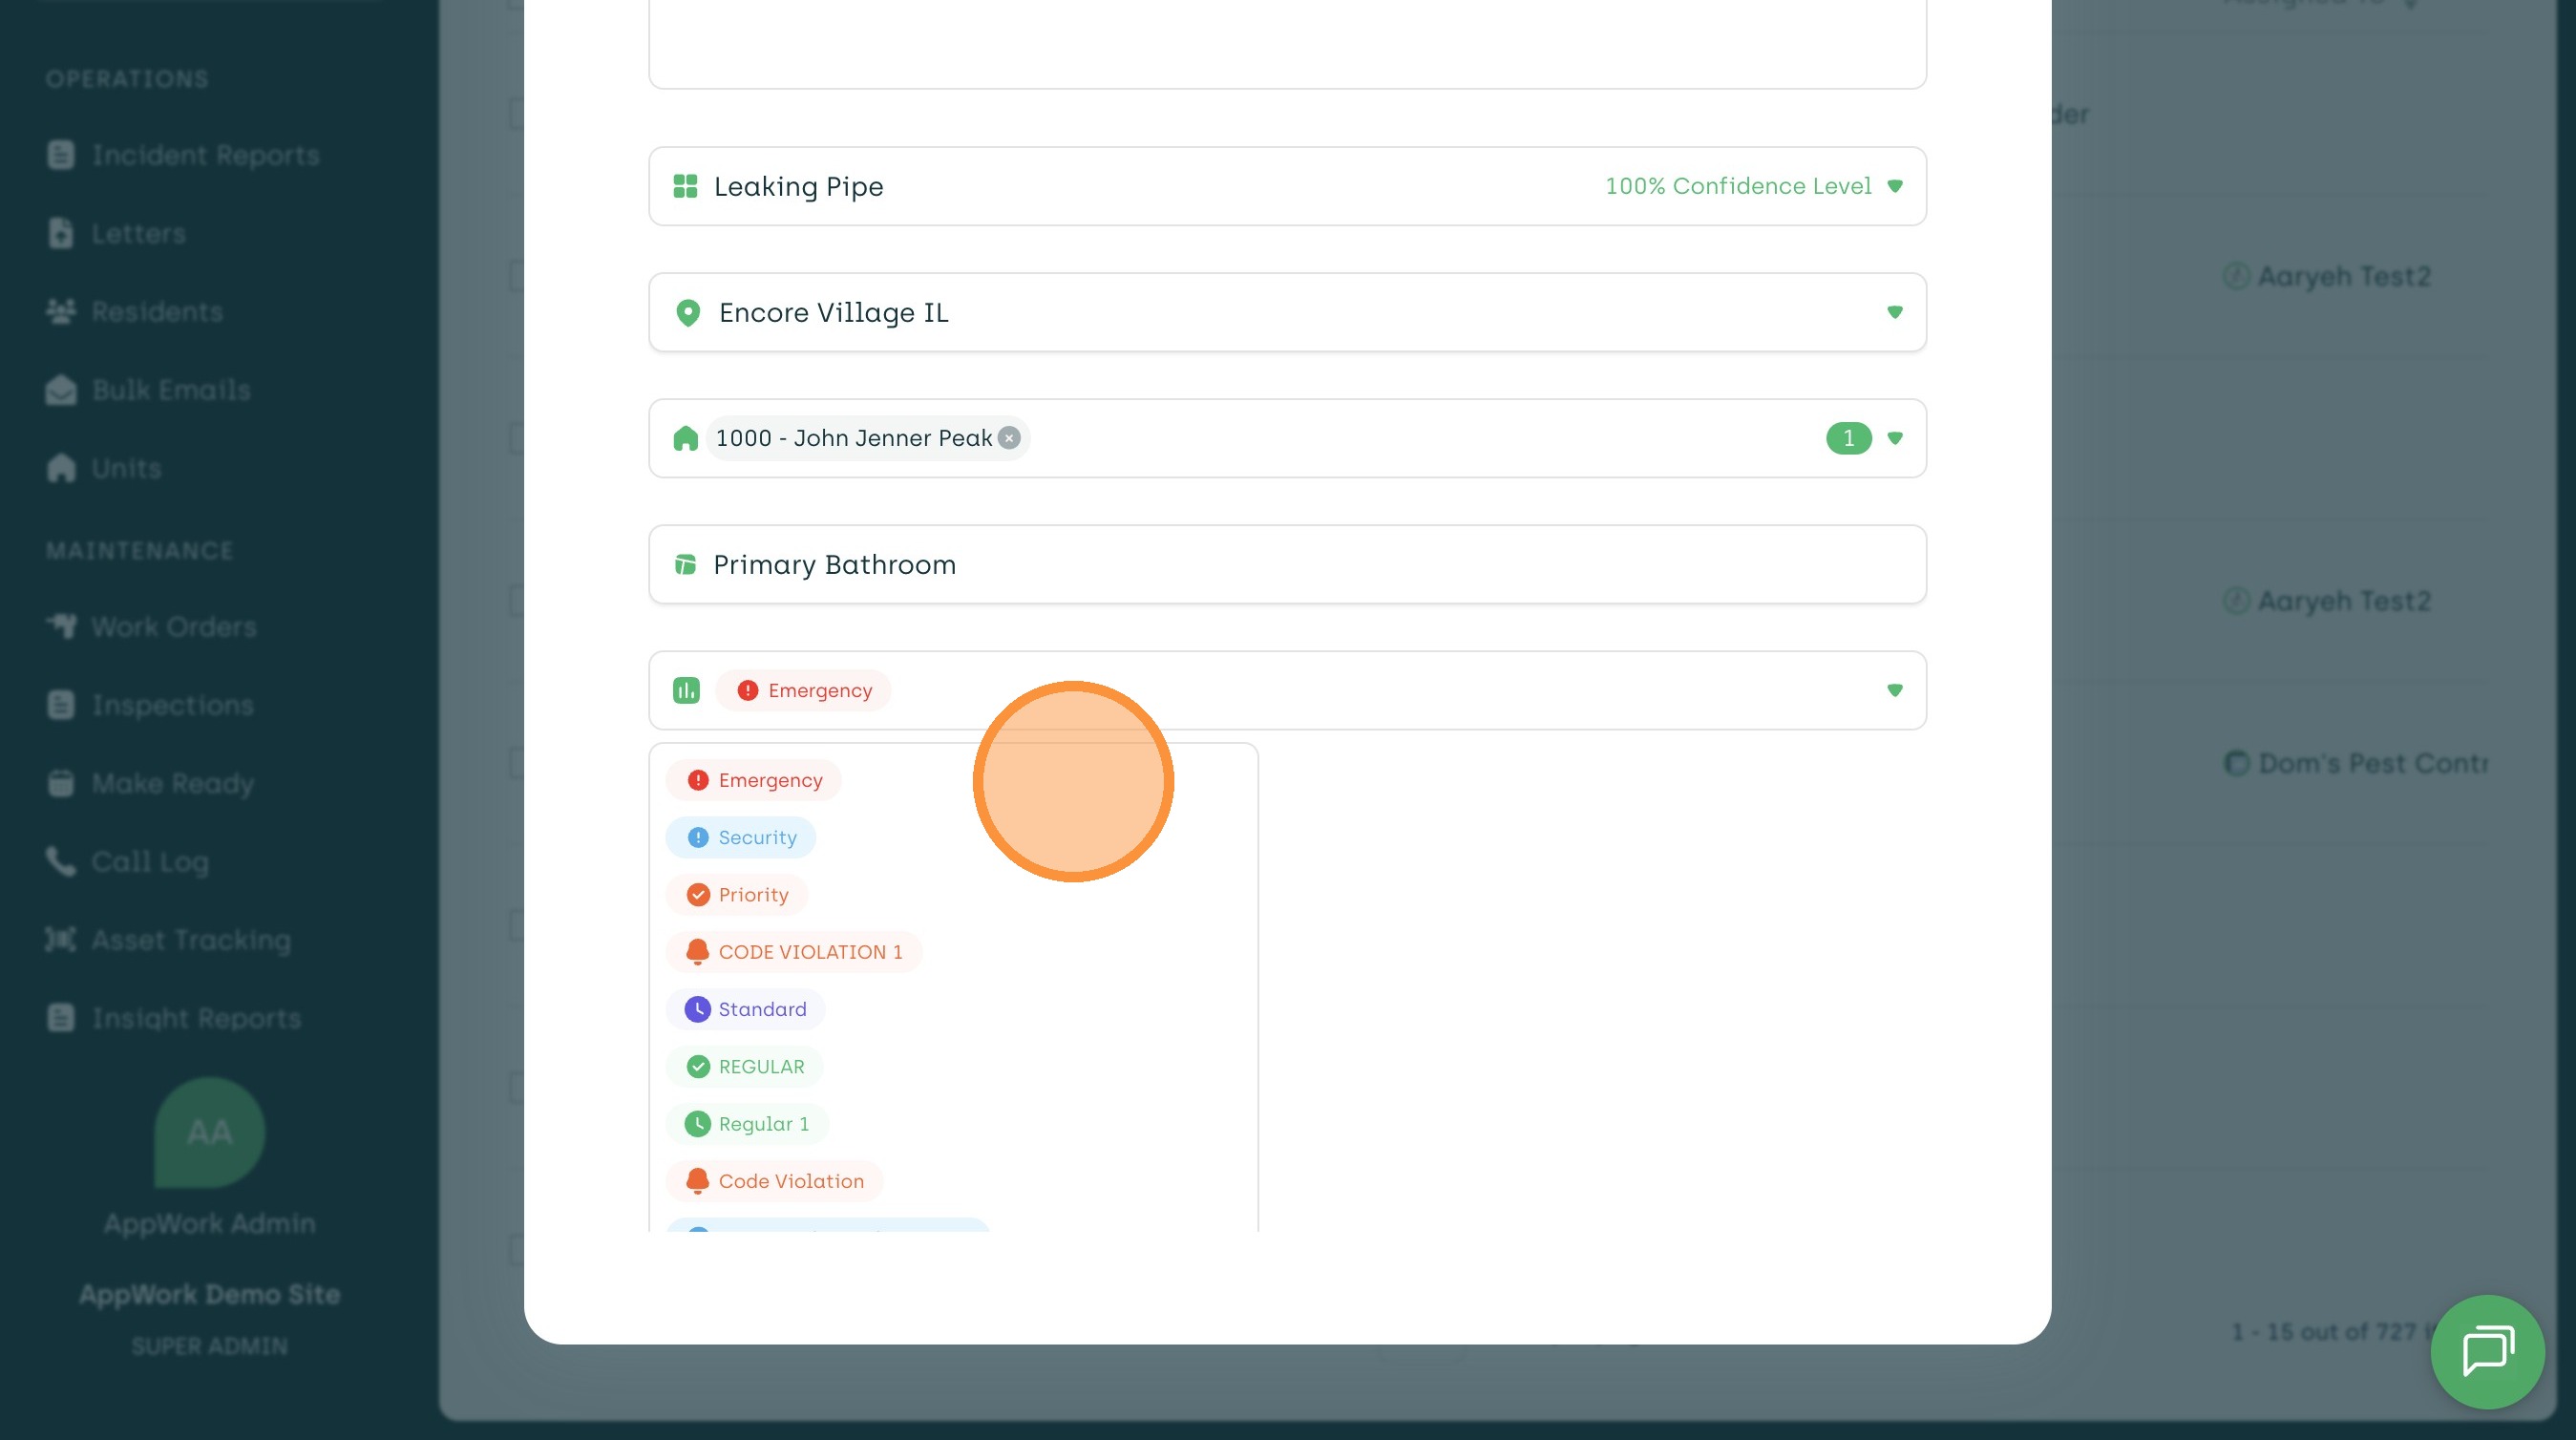
11. You can escalate or de-escalate a work order based on the severity of the issue.

12. For a leaking sink, we'll stick with the "Emergency" status.
13. Before clicking "Create New Work Order", make sure to update the tenant's preferences.
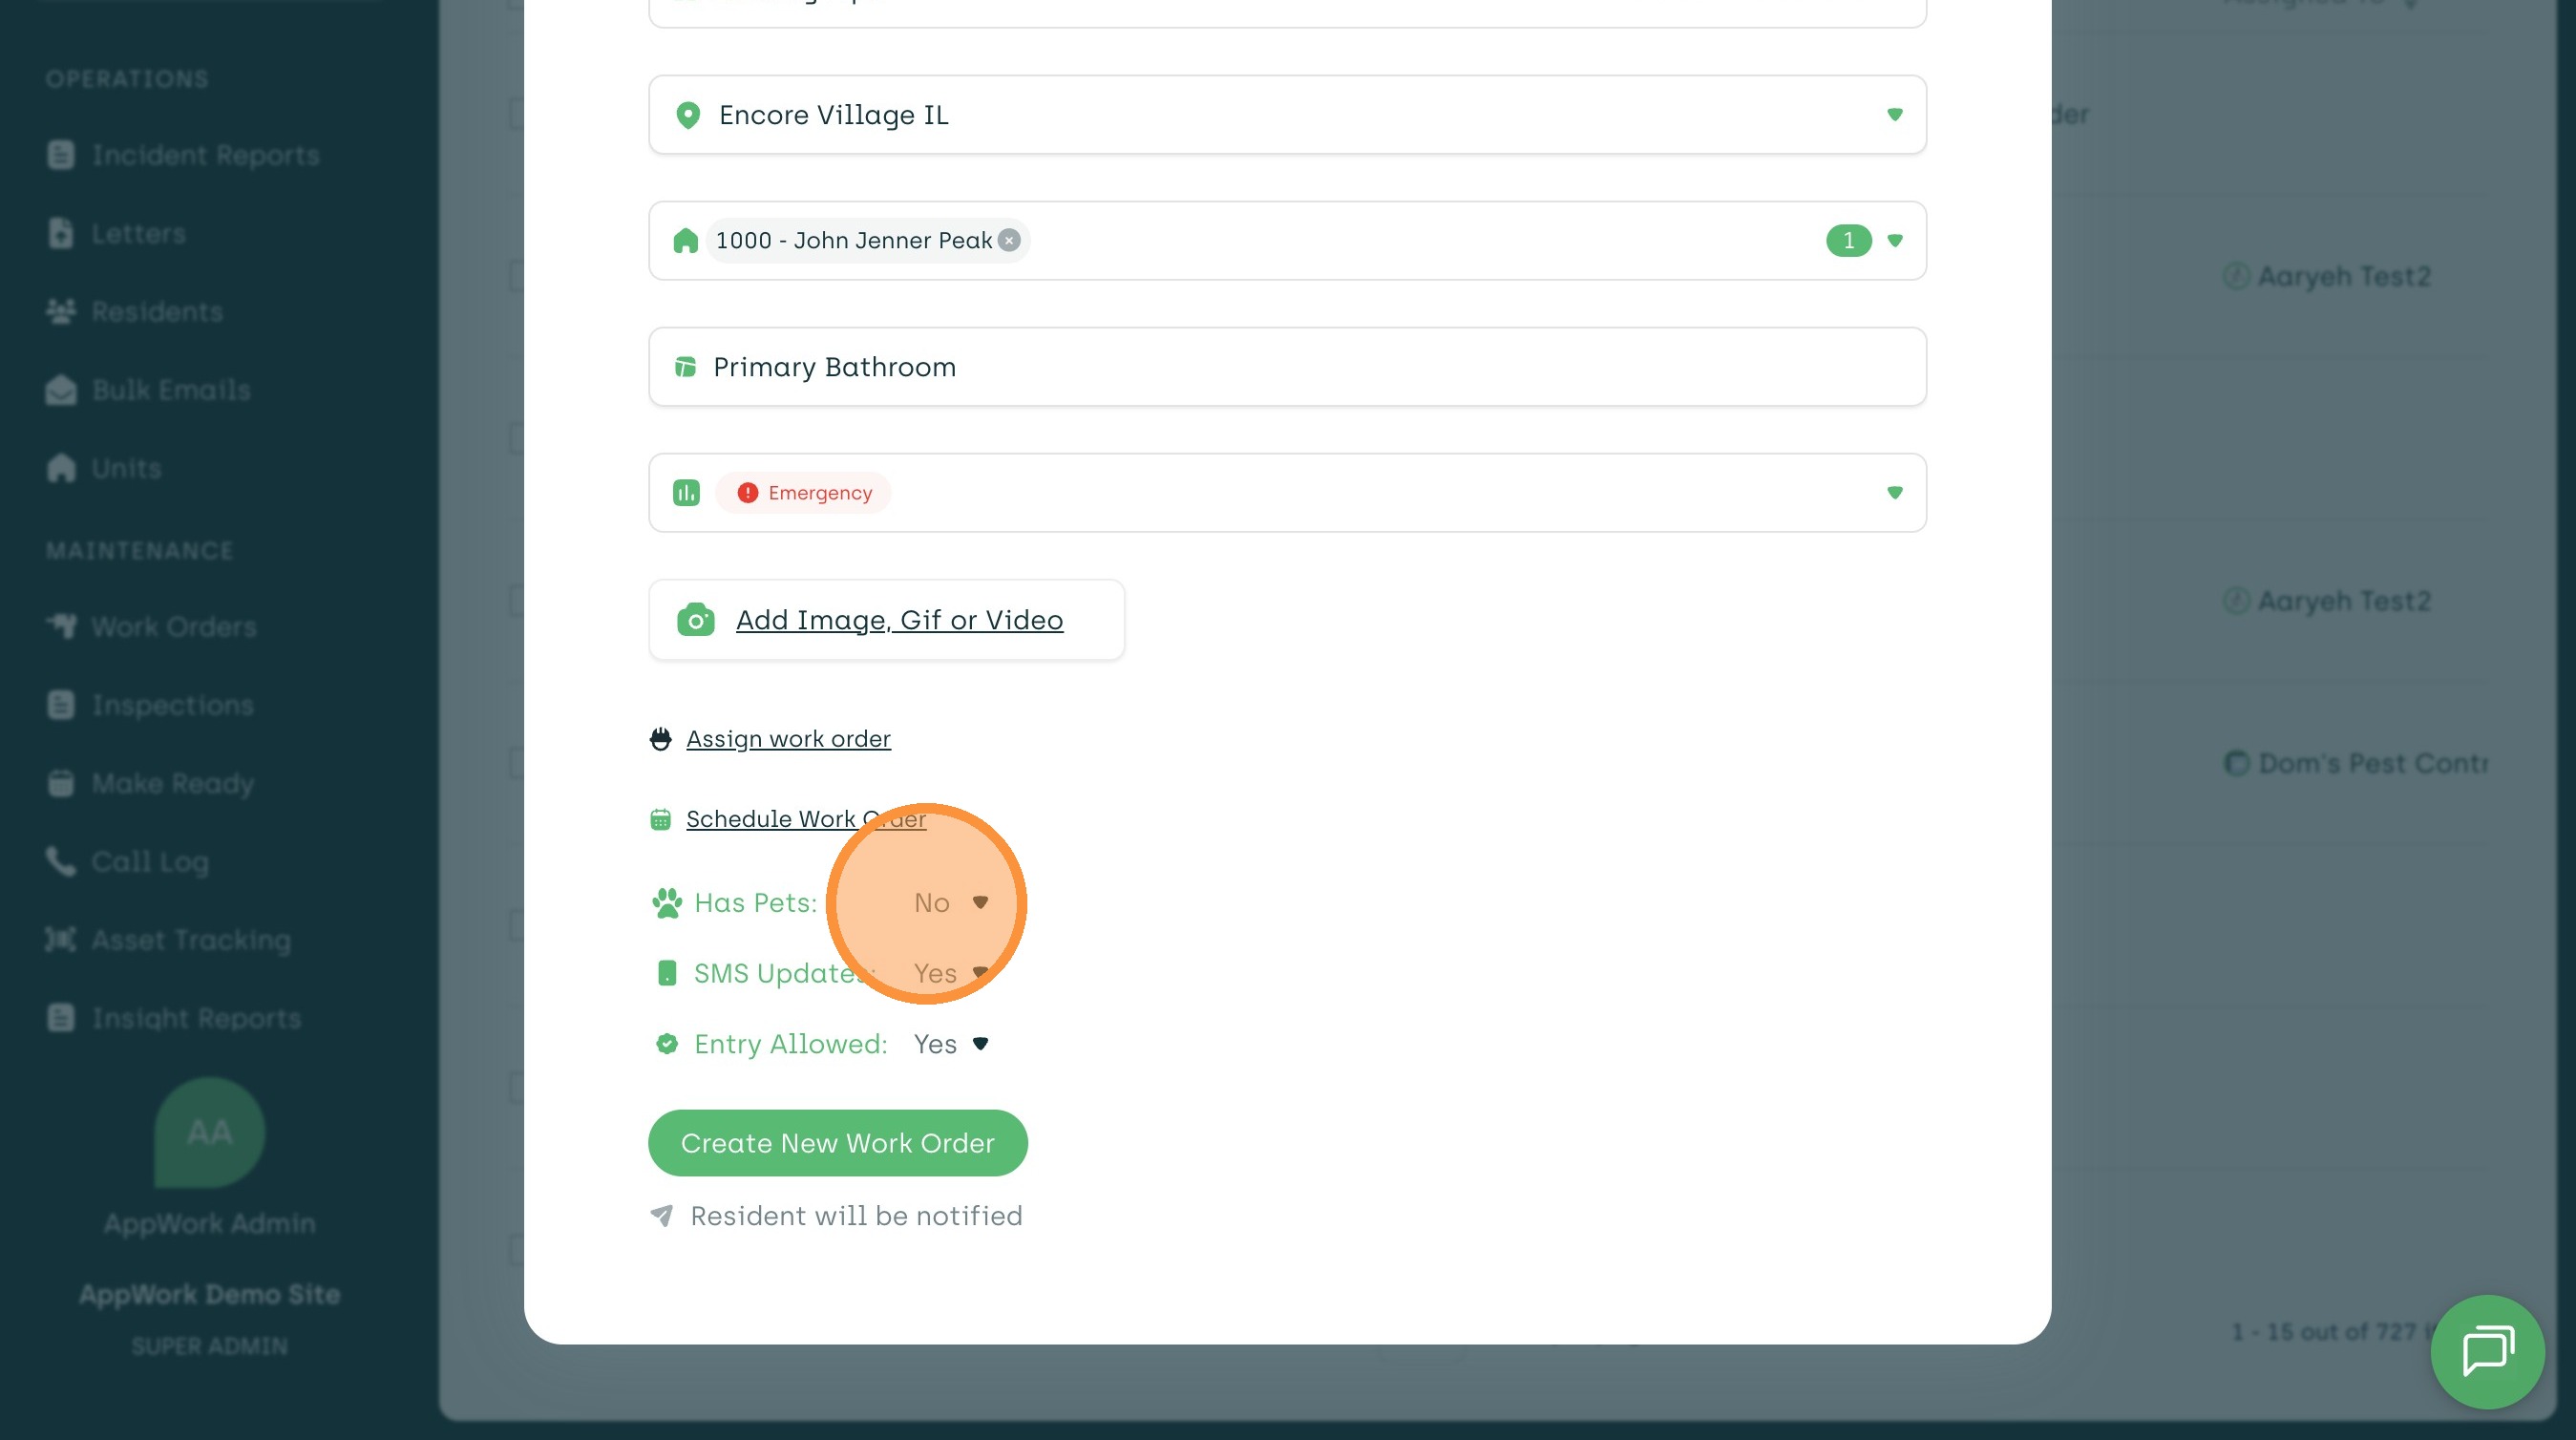
14. In this example, let's say they have pets.
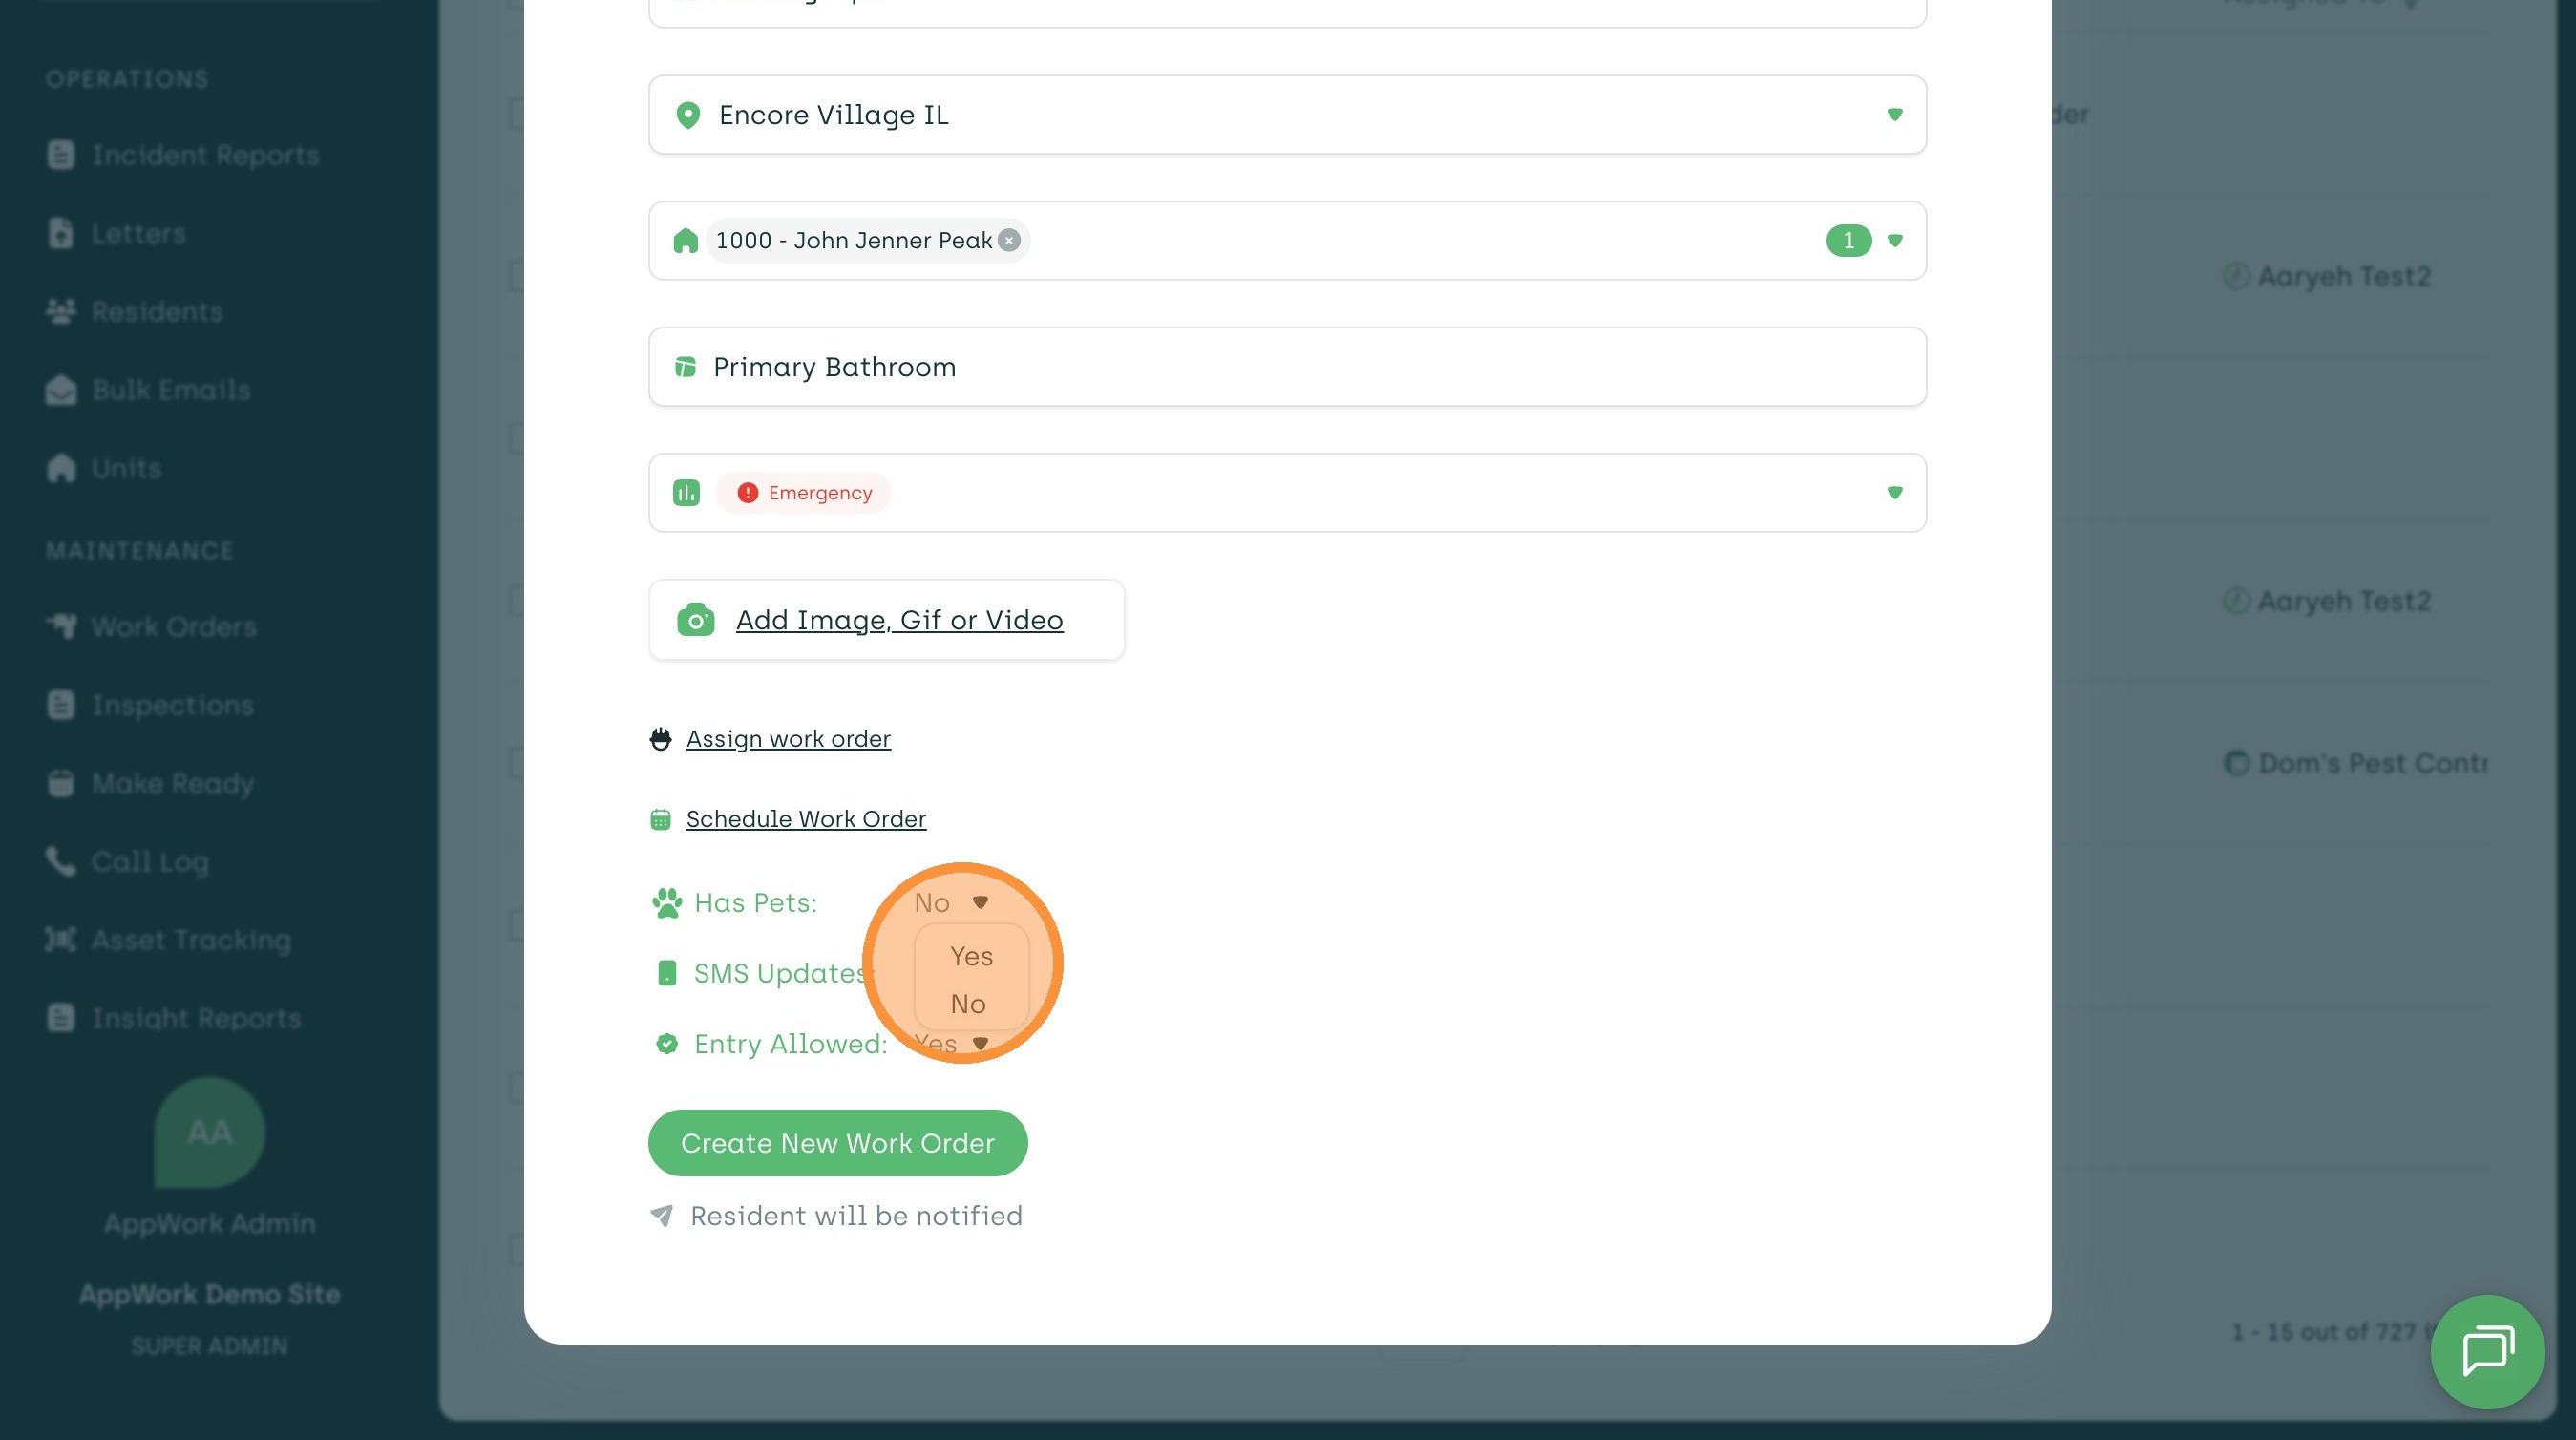
15. You can also assign the work order to a technician or vendor before the work order is created! This allows you to put high-priority work orders directly in their ticket queue.
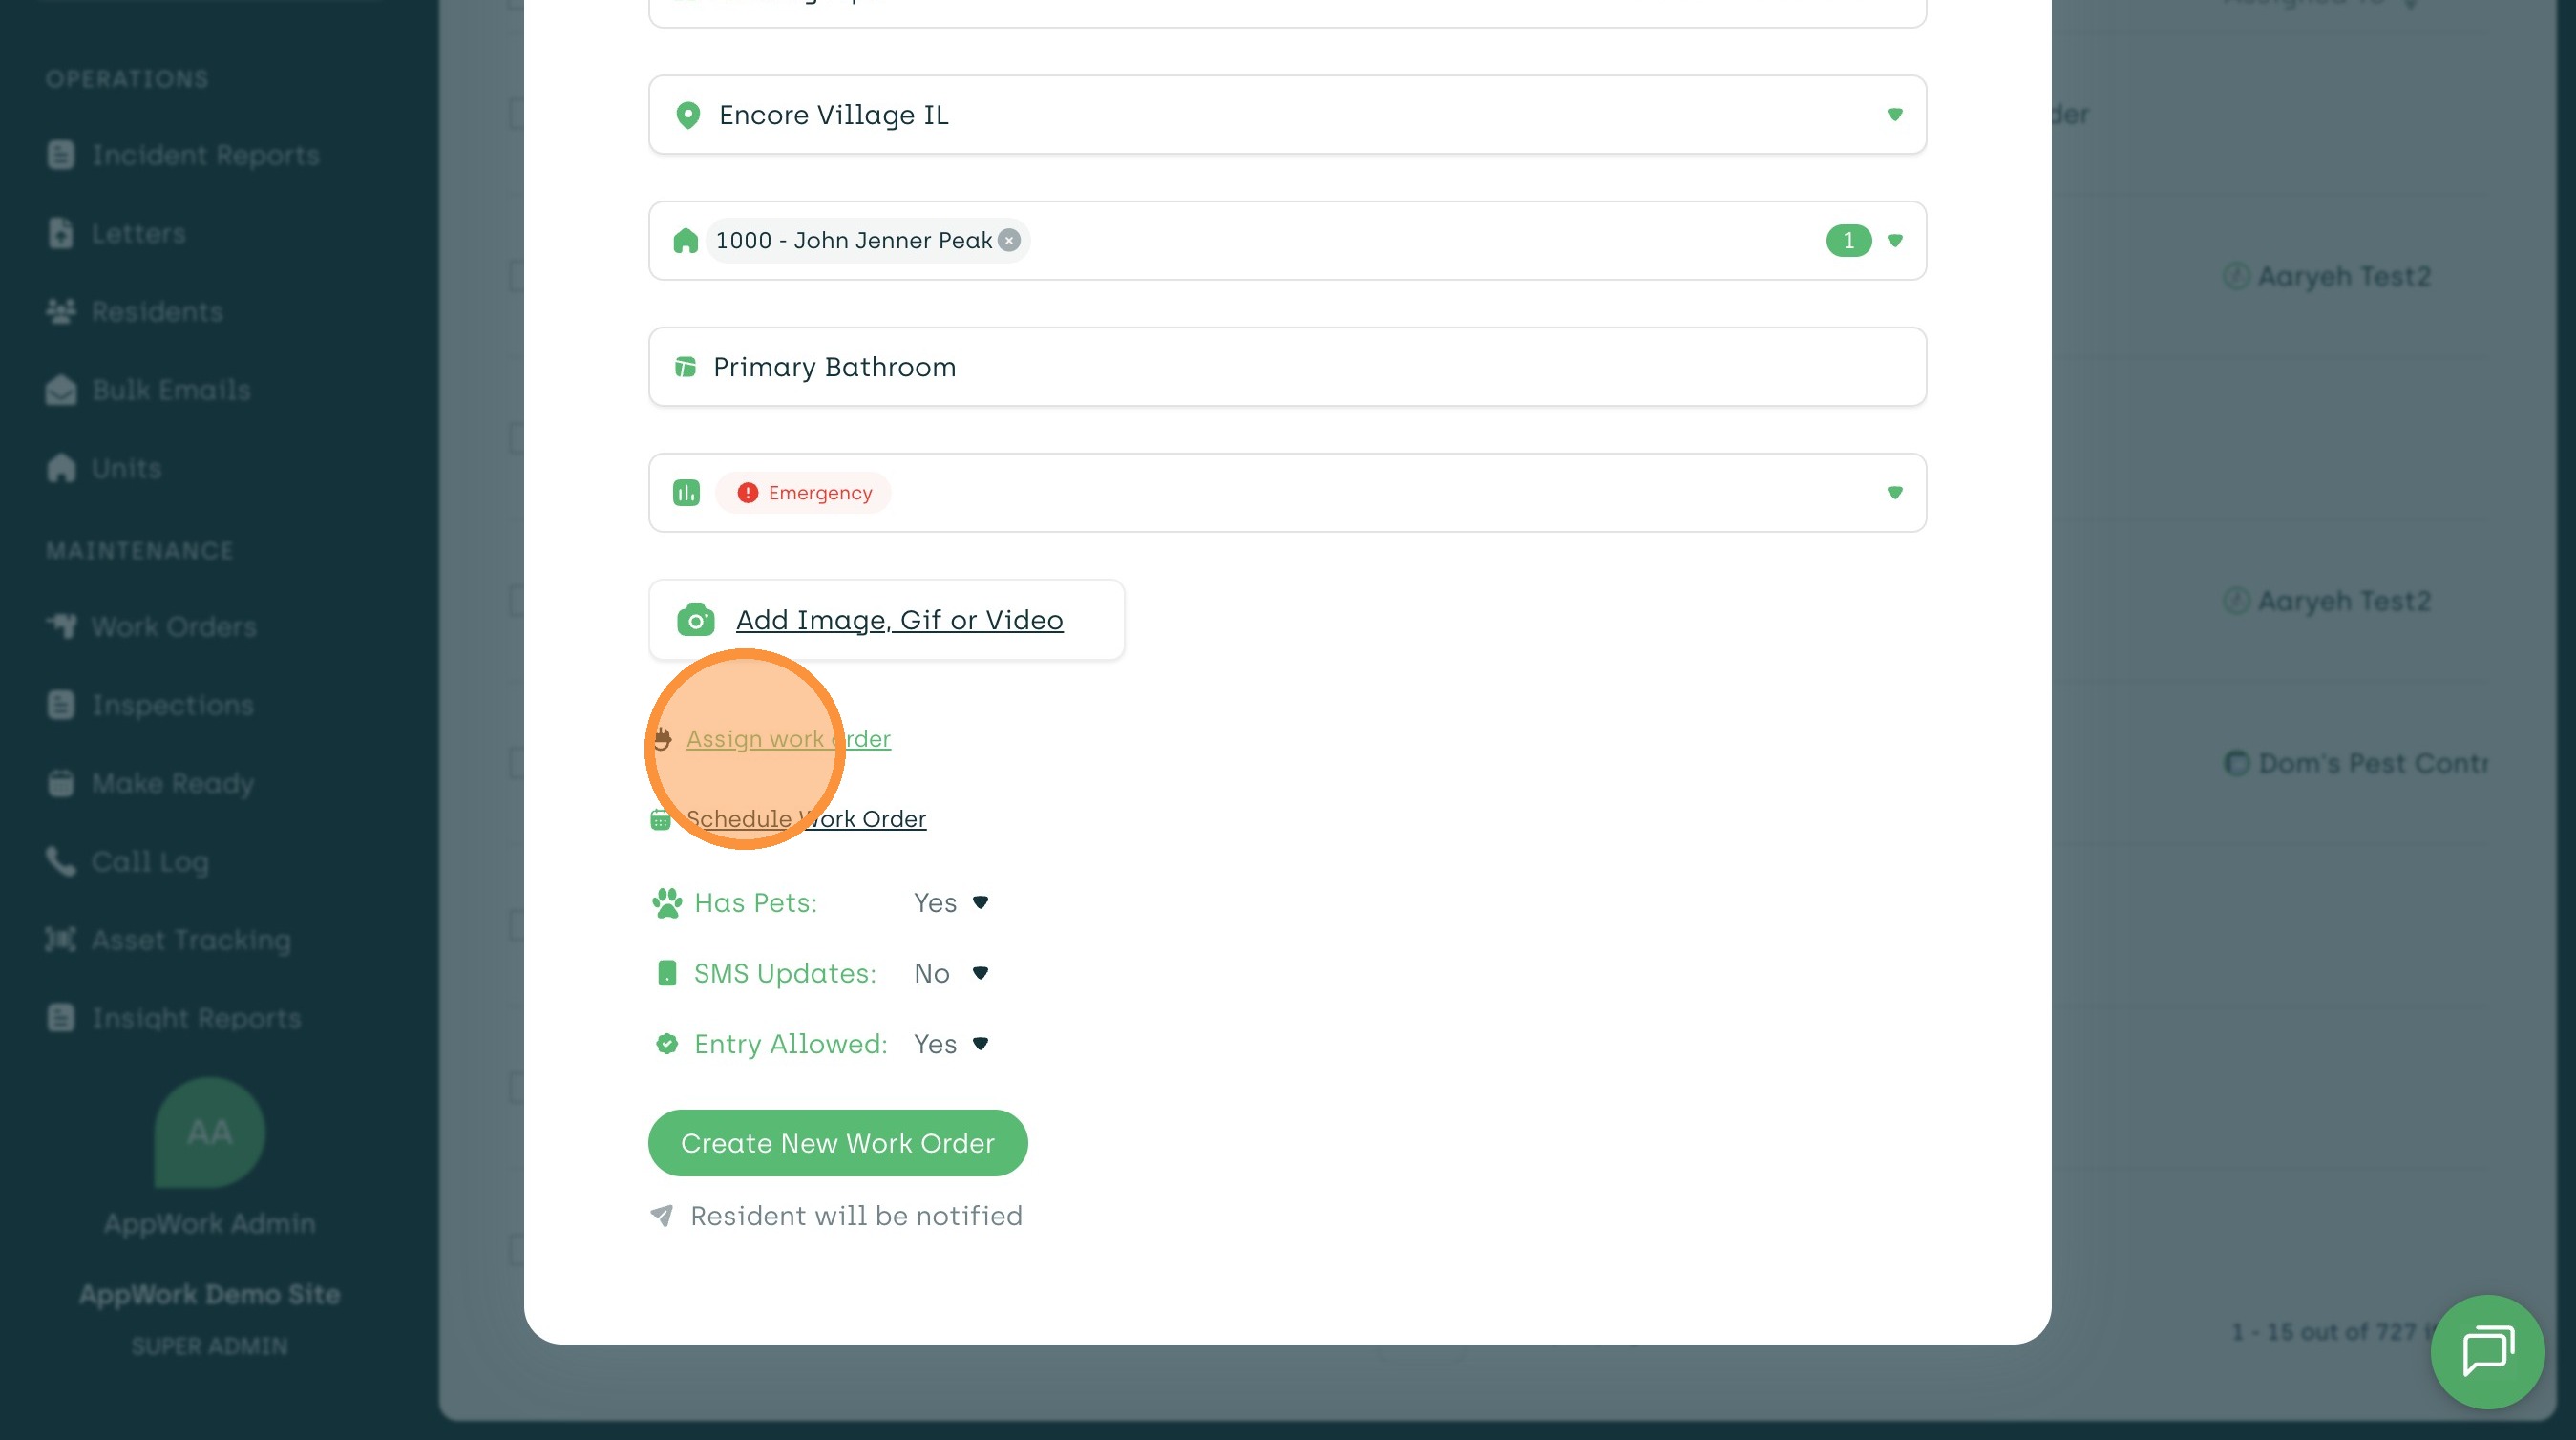
16. Click "Assign"
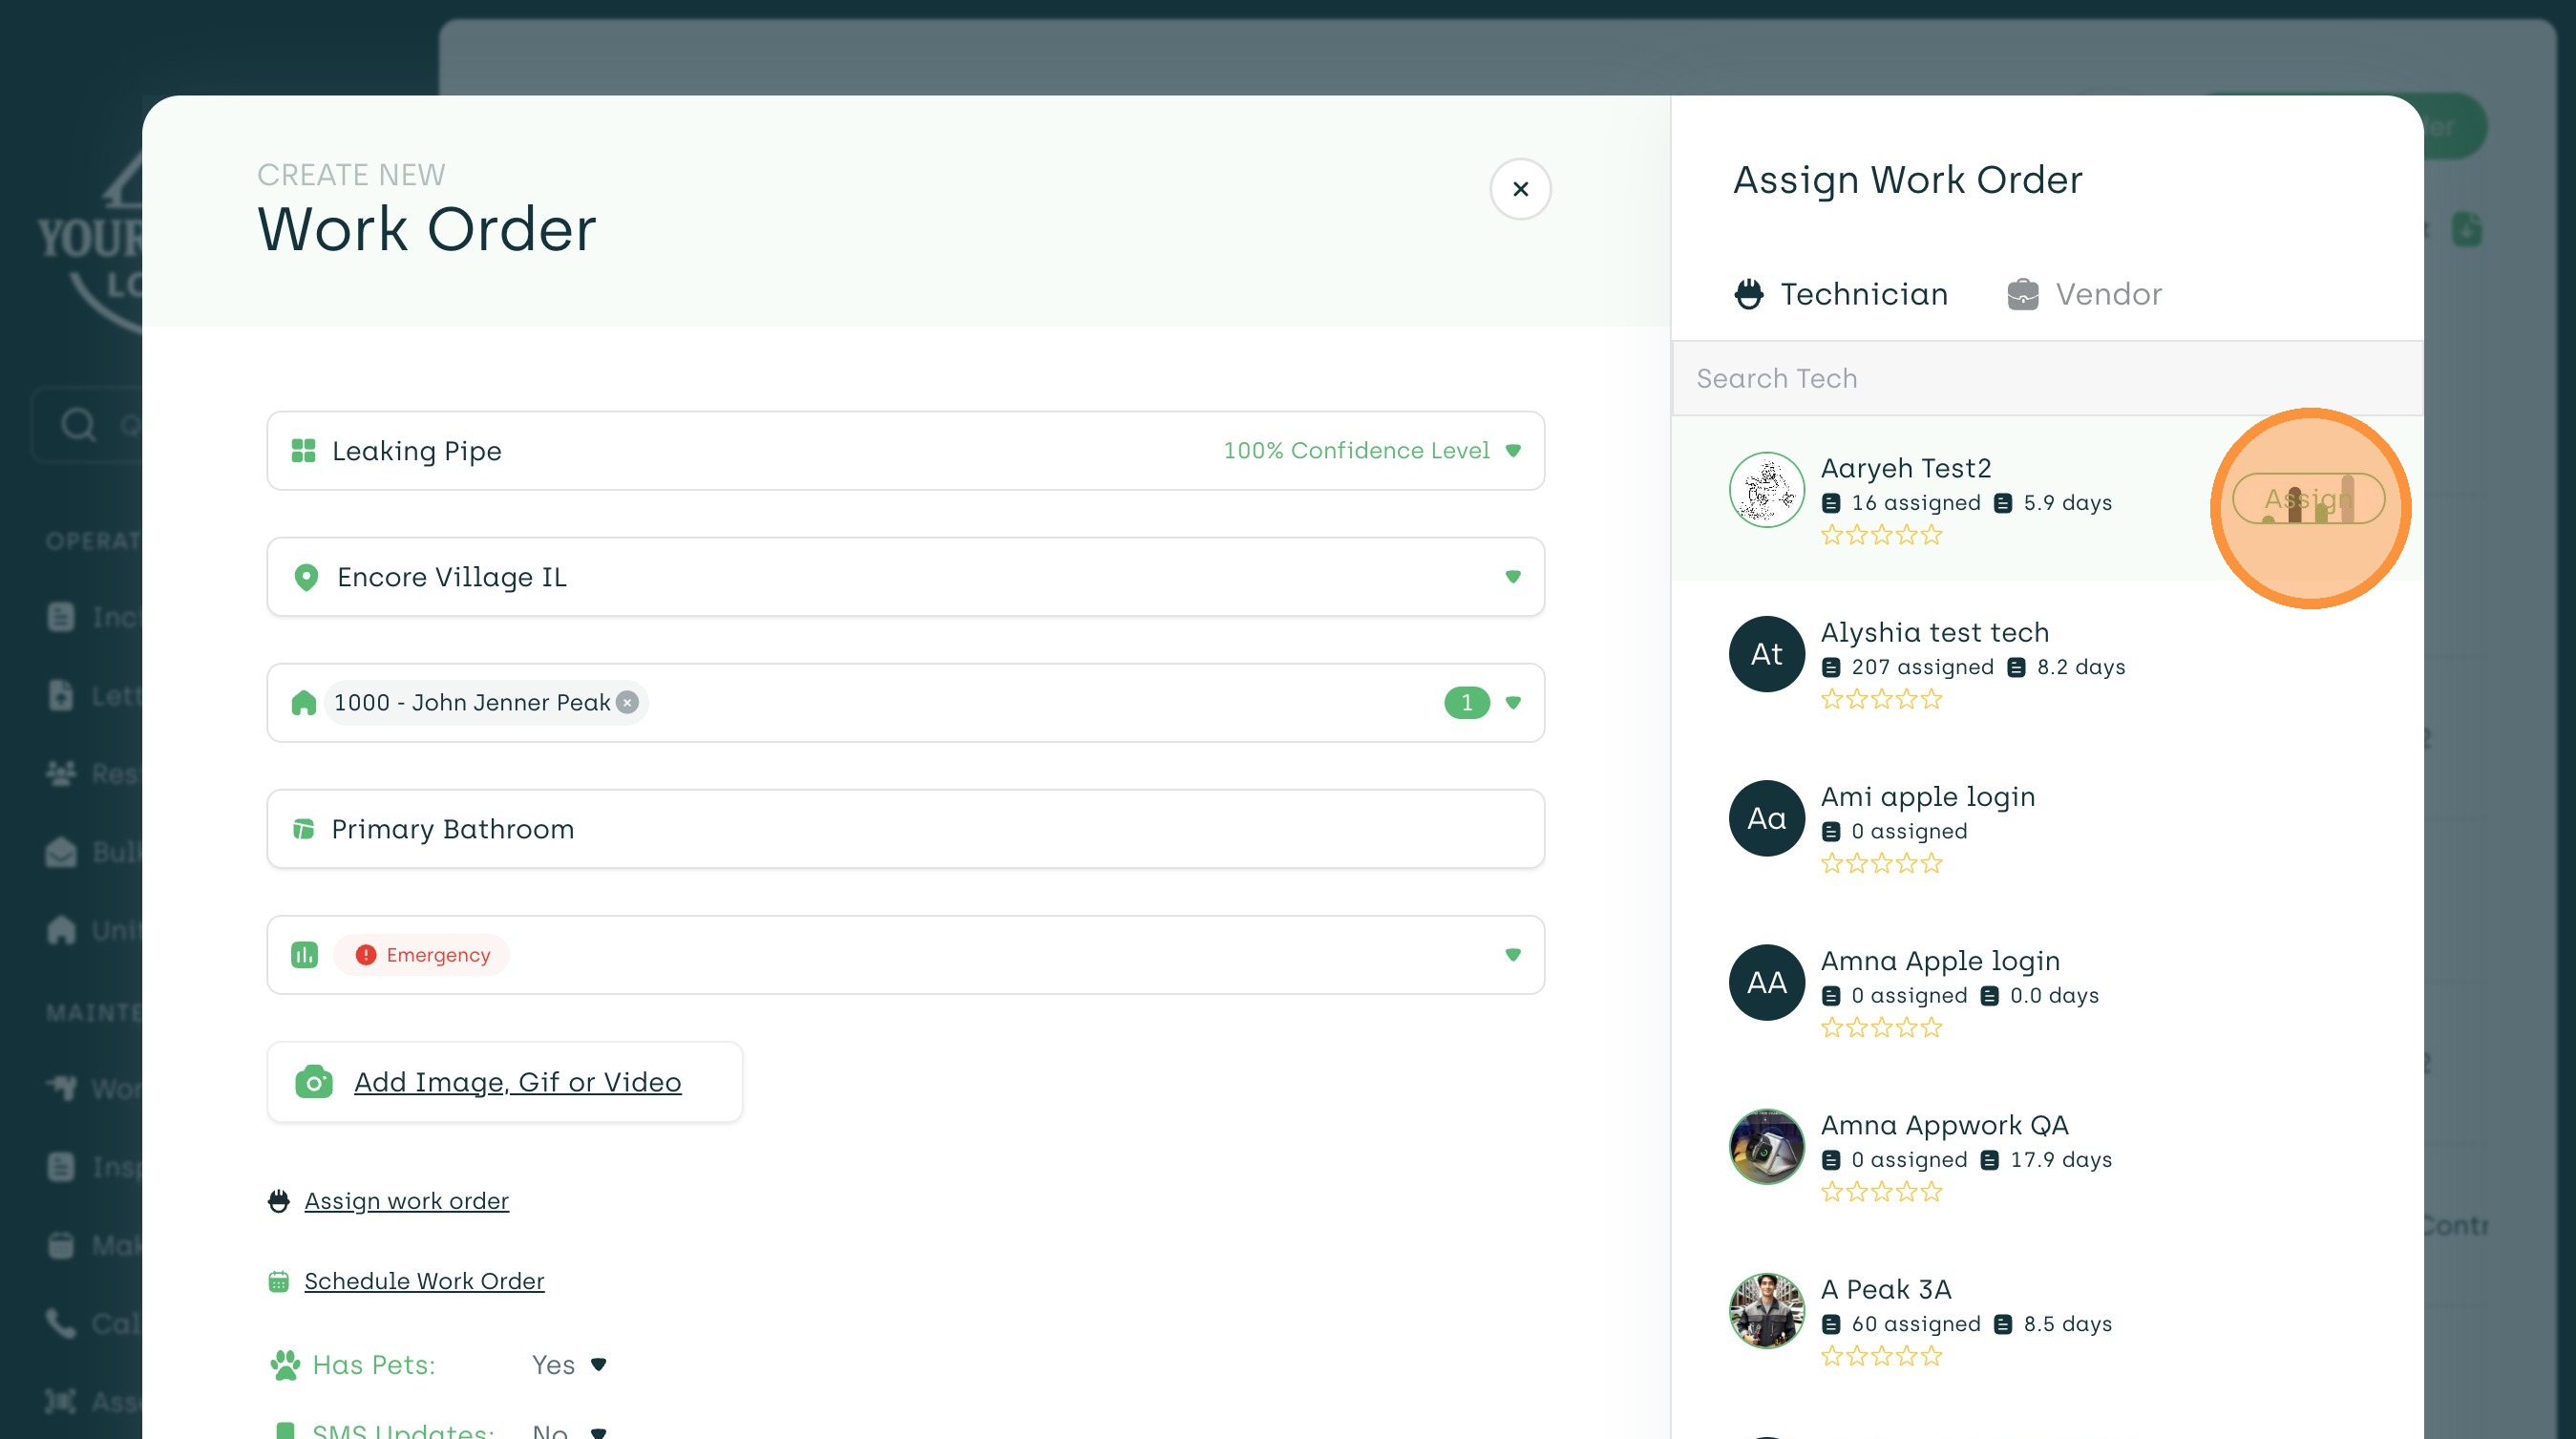
17. Click "Create New Work Order"